A flipbook is a series of images intended to be flipped over at a speed; which gives the illusion of moving image and animation. Flipbooks originally appeared in the 19th century. They can typically appear on the page corners of a magazine, at the end of a book, or as a product whole themselves. Flipbooks were the first to dawn animation before the advancement in technology. They were the original method used to create animation, and act as a software in itself in terms of presenting the illusion of moving image.

A flip book is usually a small notebook, from thirty to hundreds of pages bound together. You hold the book in one hand, and use the thumb from the other hand to flip the pages from back to front or from front to back. Depending on the speed flipped, the book can present the illusion of motion, and often portray a short story sequence. The first flipbook on record appeared in 1868 and is known to be created by John Barnes Linnet. It appeared under the name kineograph which means "moving picture". It was also the first flipbook to stray away from the Phenakistoscope theme and became more linear rather than circular.
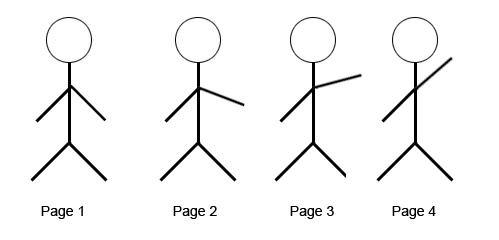
Fig - simple waving animation
Flipbooks require persistence and constant attention from the viewer. The eye must always be focused on the flipbook to see the illusion, this effect is called persistence of vision. Persistence of vision is when your eye and brain see two or more images very quickly, one after the other. The eye then blends these images together so that the brain interprets it as the illusion of animation.
Phenakistoscope
A Phenakistocscope uses the same principles as a Flipbook in terms of creating the illusion of animation with still images, however instead of using a linear process of displaying the images rapidly. A Phenakistoscope uses a circular motion which consists of a spinning disk or wheel consisting of sequential images. In 1839 Belgian Joseph Plateau planned to create the first Phenakistoscope in 1841. Later the same year the Austrian Simon von Stampfer invented the stroboscopic disk, a feature that works the same way as as a Phenakistoscope.

The Phenakistoscope used a spinning disc attached vertically to a handle. Arrayed around the disc's center were a series of drawings which represent phases of the animation. The user would spin the discs and look through the moving slits at the disc'cs reflection in a mirror. Each image would display one after the other as the disc was spinning creating the illusion of animation. This is similar to how flip books work in terms of combing multiple images at a rapid speed to trick the eye. Relating to the name Phenakistoscope; originates from Greek "Phenakizein" which essentially means "to deceive" or "to cheat. Similarly to how it deceives the eye by making the objects in the pictures appear to move.
Japanese Anime
Anime is a style of Japanese film and television animation, typically aimed at adults as well as children. Anime is an abbreviation for animation in Japanese. Anime is a diverse form of art with methods and techniques that have been adapted over time, due to technology advancement.
Even though anime is an abbreviation for animation, anime generally focuses on the setting, camera shots, camera movement and art style rather than movement and animation itself. Anime consists of many genres and is distributed theatrically by television broadcasts, over the Internet and directly to home media.

Anime was first created at the beginning of the 20th century. Japanese artists and filmmakers were inspired by western animation, more recognizable as cartoons. The Japanese experimented with the techniques that were being explored in the west, thus anime was developed. Very few complete animations produced at the dawn of anime are still around today, mainly due to commercial nature.
The earliest Japanese animation titled Katsudo Shashin – Moving Picture in English, was produced around 1907 to 1911 consists of a 3 second film loop of 50 frames depicting a young boy in sailor suit who writes kanji, turns removes his hat and salutes. It was made private rather than public as the creator’s identity is unknown.

Toei animation produced the first colour anime in 1958 known as Hakujaden – known as The Tale of the White Serpant. Hakujaden was considered the first modern anime, Toei later went on to produce the famous titles today: Dragonball in 1986, Sailor Moon in 1992 and One Piece in 1999.

Fig - Goku from Dragonball
Towards the 1970’s and 80s, anime was further developed and became accepted in the mainstream in Japan. With the popularity of famous titles rising, many anime series began to become fan subbed due to the internet. Typically Anime is produced with Japanese voices, later with further increase in popularity and technology, anime like Dragonball became world-wide famous and eventually became english-dubbed.
Cel Shading
Cel shading is most commonly used to portray a "cartoony" style and is often similar to the images found in comic books. It is a type of rendering designed to emphasis colour in 3D computer graphics by using less shading colour instead of gradients, tintis and shades. Cel Shading is not exclusive to video games, it is used to achieve a hand-drawn look via computer polygons. It applies first and foremost to the way lighting is rendered, and is less intense on the graphics processor so games can be played smoothly even on less powerful hardware. Games like the Legend of Zelda: The Wind Waker is an example of where Cel-shading has taken use in the video game industry.

Fig - The Legend of Zelda: The Wind Waker remake HD for the WII U

fig - Jet Set Radio (2000)
As the decade progressed more cel shaded games were produced: such as first person shooter XIII in 2003 and street fighter IV in 2009. Later Nintendo's top games like Pokémon also recieved cel shading on the 3DS.
Computer Animation

Computer Animation, also known as CGI (Computer Generated Image) is a modern form of animation, first seen in the 1960s and developed at Bell Telephone Laboratories. CGI is the processed used for generating animated images by using computer graphics. An image is displayed on the screen and repeatedly replaced by a new image that is similar to it, but advanced slightly, to create the illusion of moving image. In computer Animation, the speed in which this process is measured in is called FPS (Frames Per Second). A Frame is a complete still image. Frames are generally displayed at 24 or 30 FPS. By allowing frames to be displayed at a consistent FPS the image is displayed clearly, resulting in the creation of the illusion of movement.
One of the first major steps to development with computer animation was the 1976 film Futureworld. It featured a computer animated hand and face which are were created by Edwin Catmull and Fred Parke. It was a development from their university project called A Computer Animated Hand which they created in 1971. The first full length computer animated film was Toystory, created by Pixar in 1995. This was the first film to feature computer animation, which lead to it's sequels Toystory 2 and it's most recent addition Toystory 3 in 2010. The success of Toystory was recognised and dawned more computer animation feature films such as Shrek in 2004, Avatar in 2009 and Frozen in 2013.

fig - Toystory feature film for computer animation
Although today computer animation uses 3D graphics, 2D graphics are still used to create stylistic low bandwidth renderings. Application softwares such as Adobe After Effects, Final Cut Pro and Element 3D are popular in todays modern society. They allow creation of computer animation ranging from simple complexity to massive explosions. These accessible programs can be purchased from the internet and feature preset animations and frames to allow for massive amounts of potential creations.
My chosen at style - Pixel Art History
Pixel Art is a form of digital art, created through digital programs such as Adobe Photoshop or Illustrator. It uses raster graphics software allowing images to be edited in the Pixel level. Graphics in most traditional computer consoles, old calculators and mobile phone video games are created with Pixel Art.
The concept of Pixel Art began in 1972 in Richard Shoup's SuperPaint System and at Xerox Parc. However Pixel Art was first published in 1982 by Adele Goldberg and Robert Flegal of Xerox Palo Alto research Center.
Pixel art was often used in older computer and console video games, however with the increase of technology, the use of 3D graphics have emerged, rendering some of the Pixel Art's uses. However despite the higher demand for 3D graphics, Pixel Art is still effective in mobile phones and other portable devices as they devices are generally lower resolution and don't have the required hardware to run intensive graphics like 3D.
Flash Development - Motion Tween
Flash is a program used primarily for animation. Today I began learning Flash, and uncovering it's capabilities. Motion Tween is an technique used in an animation sequence which allows the computer to render the "space" between two key frames and present it as a smooth playback. I began my development from creating various shapes in flash using the shape tool and was able to create a motion tween for two squares. I found the task enjoyable and quite simple to understand as I already have previous animation knowledge from Adobe After Effects, including keyframes. However the Motion Tween technique itself was different for me, as the process of tweening the keyframes together was a new experience, and the core of Flash animation.
Flash Development - Shape Tween
The next step was using a similar process to Motion Tween, called Shape Tween. As the name suggests the technique involves morphing two shapes from one to the other. In the video below you can see my attempt in creating a shape tween, from a circle to a square. I find this development to be a great experience, as not only the technique has helped me familiarise myself with Flash, the technique offers potential when creating shapes for games IE: a tear drop.
Flash Development - Bouncing Ball
My core development of flash was taking Motion Tween to the next stage by creating a bouncing ball. I found the initial task was a success as I feel i understand basic movement in Flash, however when I was attempting to add more diversity to the ball I encountered a challenge. I found it a challenge to add a bouncing "effect" to the ball originally as i couldn't grasp linking two motion tweens together, which resulted in my bouncing ball to stutter.
Initial Basic Storyboard Idea
Using the Magic Paintbrush as a story I created a basic storyboard to animating the Magic Paintbrush. I researched some previous examples and was greatly inspired to creating this animation as a video game, Pokemon. I watched the introduction to the game and could picture to how I could create the animation using the pokemon theme.
Introduction to Pokemon Red
Following the inspiration for Pokemon Red, i took notes of what the storyboard may look like in terms of shots. As you can see in the image below, I wrote 16 bullet points, which suggest to me that my storyboard will have around 16 shots. From doing this I obtained a stronger idea on how i wanted the storyboard to tell the story of the Magic paintbrush

Using my notes as a reference I created an initial storyboard to how I think my animation will look. In this initial storyboard I created 15 shots. The basic storyboard helped me realized how I want the animation to cut to each scene. It also helped me discover what style I want my animation to be. With character designs coming up I will attempt in creating something unique: a pixel character design.

The storyboard opens with the title displaying "The Magic Paintbrush", it then cuts to the next two scenes where the characters names are input. The storyboard then cuts to a shot where the the protagonist decides between three paintbrushes, as seen in the Pokemon game. The storyboard then cuts to the next shot where the protagonist fights the antagonist, also known as "the bad man' in the story of the Magic Paintbrush. The protagonist loses the battle and whites out (as seen int he Pokemon game).

Pokemon Sprite Sheet Research

I spent some time researching different sprites from Pokemon to give some inspiration in how I could create my own pix-elated character. I feel from looking at these I can achieve more of an understanding in how to create a character. Using this as a reference I will create my character using Photoshop. Although the characters are in pixels they seem to consist of lots of detail, each pixel is perfectly placed to make up the features of the character or object.
Character(sprite) Designs

I found this task interesting as pixelated characters are interesting in terms of how they are created. If done right they can look simple, yet effective.
Storyboard Improved - With Characters
I created a second storyboard with colour and more detail in how my animation might look. I used my character designs and place them into my storyboard to gain an understanding in how they might look.

The scene begins with the magic paintbrush title screen with the press start flashing on and off. The scene then cuts to the protagonist and antagonist naming screens where each name is placed. The scene then cuts to Ma Liang who is interrupted by an old man who brings him to his lab where he is given the Magic Paintbrush.

As our protagonist is traveling he encounters a pool of water that blocks the path. To pass the obstacle Ma Liang is prompted with the option to use surf to cross the water, which he confirms and proceeds to meet the Badman. Upon meeting the Badman they have a first battle in which Ma Liang loses due to the Badman using the move Thief (which represents Ma Liang losing the battle and thus having his paintbrush stolen). Ma Liang is greeted by the Old Man once more in the village where he began his journey. There he is informed that the Badman is requesting his presence.

Once Ma Liang meets the Badman for the second time he requests a gold mountain. They battle for the second time where the Magic Paintbrush uses hydro wave and defeats the Badman.
I feel from creating a second storyboard I was able to gain a stronger view in how my animation might look when it's complete, as well as obtaining a first time view of how characters and sprites may be incorporated into my animation.
Character Walk Animation
Following from my previous Flash development from the bouncing ball I attempted animating a walking animation. I found this task more of a challenge and as a result it took more time to complete. Through following a tutorial and trial and error I was able to create my first character walking animation. The process involved using illustrator and photoshop to create a character.
.gif) Using layers in Illustrator allowed me to simply trace over still images. As seen in the image to the right (designs made by Preston Blair) using the paintbrush tool I was able to draw over the designs; creating still images which would represent each singular frame when imported into Flash.
Using layers in Illustrator allowed me to simply trace over still images. As seen in the image to the right (designs made by Preston Blair) using the paintbrush tool I was able to draw over the designs; creating still images which would represent each singular frame when imported into Flash.When I had completed drawing out each frame I imported the images as separate components into Flash. Using this I was able to place all the images on top of each other and created a stop frame animation.
From adding each image to their respective frames I was able to set them to display one after another which resulted in the illusion of a walking character animation.
Main Character Walk Animation
Main Character Walking Animation with Sound
Evaluation & Feedback
Character Basic Face Expression
Typface Research

Font style

The font type I have chosen to use for my animation is called Pixelade. I like this font as I feel it's not too heavy or over dramatic on effects and funky appearances like some of the other typefaces. I believe this typeface is simplistic and portrays the pixel theme well. I also discovered a similar font to the Pokemon game for the main title in my animation, as seen above the pixel typeface. I believe that this font is indepth and thick in terms of appearance and can be efficient in terms of standing out and presenting the title.
Pokemon - Title Screen Research
I looked at the Original Pokemon opening for the title screen for the Gameboy. The title screen presents the name "Pokemon" in a bold font across the top of the screen, followed underneath is "Red Version" suggesting the specfifc version for the game.
In regards to Magic Paintbrush I have an idea where I could create a similar title screen with the title of the Magic Paintbrush; Magic Version in the place of the original text. Instead of the actual Pokemon being placed on the centre of the screen I would place a Paintbrush.

The start screen as seen in the image above is the first scene, seen in my animation where the name: " The Magic Paintbrush" will be presented, followed with the Press Start Button. I added some stars into the scene to place emphasis on the Magic, whereas this isn't seen in the original game. Although the original title screen is in black and white, I believe adding colour to my design would help in making it feel more alive and vibrant.
Audio Research

I used the above websites to discover the following SFX, I own no music used in the animation, all music belongs to their respective owners. Click the links on the images above to be directed to their respective sites. I used Freesound and Teknoaxe to discover my tracks both supply free SFX and tracks to use.
I wanted to discover a sound effect that represents the sound played similar to the "chime" effect used in the Pokemon series when the player makes a selection. I found a sound effect similar to this on Freesound.org and plan to place the SFX onto the timeline to sync when a selection is made, or a new text box appears.
This is similar to the technique used when applying a footstep SFX to an actual footstep. The sound will require precise positioning on the timeline in order to successfully sync with the animation.
Inspired from the pokemon games i wanted to find a "rival" theme for the antagonist character in my animation. I found this piece of sound that effectively provides the atmosphere for my character. The sound is jumpy, and begins with simple loud beat which I find extremely powerful in terms of linking the SFX with the first encounter. I found it to be a difficult process to search for SFX due to it's 8 bit quality. It proved difficult to find fitting music for my animation because of this.
In regards to the battle scenes, I have an idea where in how I want to sync the beginning of the battle sequence with the music. The beginning of the music begins with simple beats that build up in intensity and pace which suggest the dawn of a battle. I like how this 8 bit music piece builds up and think it will effectively link with the rival theme; allowing the two sound tracks to flow into each other.
I wanted a SFX that I could play when the protagonist collects an item, in this case when he relieves the magic paintbrush. I discovered a 4 minute long 8 bit music clip, which i cropped to 2 seconds. The SFX consists of a two simple beats, a lower toned beat followed by a higher toned beat which emphasises the collection of an item.
Discovering a sound piece for the start screen intro for my animation was the toughest challenge yet. I wanted to place sound that could easily be remembered and recognised when heard. The beat needed to be simple, yet effective in being repetitive. I found this sound piece that is similar to an arcade style game, enforcing the pixel theme for my animation.
This sound piece offers a relaxing atmosphere played in 8 bit quality. I believe this sound piece effectively creates a calm imagination. I will sync this track with the remainder of the scenes in my animation that do not feature the badman or a battle scene. The most difficult process with discovering 8 bit music for my animation was finding music that was simple, and not over the top with unnecessary beeps which could alter the atmosphere for my animation.
I used Adobe After Effects to amplify the volume of this sound piece twice due to it's low volume. The sound effect will be played each time the Magic paintbrush is seen, or used. I plan to sync this sound track with the creation of the gold mountain. I believe the sparkle places emphasis on the magic of the paintbrush, allowing it to stand out as a feature item.
Relating to my storyboard my animation ends with a water attack- as seen in the story. I believe this sound effect is long enough to fit with the attack. I like this SFX because although a simple sound, can be powerful in terms of bringing my animation to life and enhancing the atmosphere.
Initial Ideas

I used Photoshop to create scenes that would represent the character creation screen in my animation. Using the line tool I created a box which would contain the alphabet, and the dashes that would provide space where the name would appear. I was able to first experiment with the pixel typography i downloaded in an actual piece of work. I believe the font fits perfectly for the theme of my animation.

I was inspired from the pokemon character creation, as seen in the image above. I used simple techniques of creating the layout with tools such as the square and line tool.

Additonally I created a scene with the same character creation techniques, replacing the "Badman's name" with "Your name". The animation will play the scenes in order as seen in the pokemon game; entering your name, following that entering the Badman's name.

I further experimented with the box I had made for the alphabet, and created an extra test scene, with the options New Game, Continue and Options located within. Testing the box with this scene allowed me to confirm the effectiveness of the box I created and whether it would be most suitable for my animation. I believe the proportions are right, and create a persuading vibe.

Additionally, I used the square paintbrush tool combined with the shift key when needed to create straight lines to produce some props for my animation. I created a book shelf and some tables that I may use in the production of my animation. The tables will be effective to use to hold the paintbrushes, when the protagonist first receives his magic paintbrush.
I also created a VS scene, which I plan to import into scenes pre-battle to suggest a battle is beginning. I used the square tool, combined with the line tool to create the flashy shape containing the VS. I like this prop as it implies the arcade theme into my animation allowing it to feel more retro and original.
Character Sprite Development

To further develop my protagonist, I created sprites of him walking to the left and alternatively the right. This will be useful when creating my animation as it creates diversity and allows for the character to be able to move in different directions.

The next step was to create sprites for the old man which gives our protagonist the magic paintbrush. I was inspired by the Professor Oak sprite for this design, and created an old man sprite similar to it. I used the square paintbrush tool to create a pixel appearance, as I did with the protagonist. In addition I created the old man in multiple angles to allow for diversity when animating his movement. I found this to be a beneficial task as I was able to create a second character in pixel form, granting my further experience needed to create a final character.

The final character for my animation is our antagonist; Badman. Similarly to the previous character designs, I created Badman in multiple forms and positions to allow for diversity with his movement. I was able to gain more experience in creating pixel art, proving to be useful when creating further props
Further Character Development


To improve my character designs further I wanted to add colour to them. I wanted to create a memorable character that would be recognisable from pokemon. The protagonist in pokemon usually wears a red cap, blue clothes with a green bag as seen in the Anime. I wanted to use Ash as a reference in order to achieve this recognition. I coloured the main character sprite with the same colours as seen in the anime to create some humour. I believe this is an effective method as it generates interest for the viewer.


Following from adding colour to my main character I begun to add colour to my antagonist. I gave my antagonist dark blue hair and an intense red colour to relate to his intense actions within my animation. I found experimenting with colours to be a fun task, as the colours help shape the characters identity. I gave the antagonist red clothes as red is generally associated with evil, and red helps reinforce this in my animation during the first encounter.


The final character needing colour was the old man seen at the beginning of the story. I gave the old man a pink cap to suggest his strangeness and suspiciousness when granting Ma Liang the paintbrush. I believe the white clothing combined with the pink cap allows the character to stand out from the rest of the characters and come across as odd.
Sprite Development - Props Creation
Paintbrush Props


The above images consist of the props related to the paintbrush. I created three different coloured paintbrushes - red, blue and magic. The table scene refers to the first scene in the pokemon game where you select your first pokemon. In my animation, instead of selecting a pokemon, you select a paintbrush - in this case: The Magic Paintbrush.
In addition to creating these paintbrushes as located on the table, I created a separate sprite for the Magic paintbrush and the red paintbrush as I intend for them to be used in my animation, featuring in battles. I created a star as a separate sprite as I intend to animate multiple stars onto the screen at once, to emphasise the magic effect.
HP Pool Props

In order to allow for fluidity in the battle scenes when a paintbrush takes damage I wanted to have the health bars deplete as seen in the game, as well as having the change from their appropriate colours when health pools reach a specific range from green to yellow to red. To achieve this I created multiple health bars each with their respective colours. I intend to tween these health pools together when I create my animation.
Battle Props


I struggled in discovering a spell animation for the Magic Paintbrush when Ma Liang defeats Badman after requesting a Gold Mountain. I research various water animations from the pokemon game. I found that the most efficient shape to create for an attack would be a circle. I used the Bubblebeam sprite as inspiration when creating an attack for Hydro Wave. I created the dark and light blue circles as seen above, and plan to animate them into my animation one circle at a time, gradually exceeding in size. I also plan to name the move Hydro Wave - similar to the move Hydro Pump in the Pokemon games.
Additional Props


I created some props that I will need to use throughout my animation. The image to the left is a warp pad, used to teleport one from one place to another, I plan to incooporatate this prop into my animation when Badman requests for Ma Liang to create him a Golden Mountain. I referred to the original warp pad, seen in pokemon to achieve the diamond look and blue colour.
I created the exclamation point to signal an event is about to happen, similar to how the pokemon games suggest the beginning of a trainer battle. I plan to use the exclamation point when the Badman intercepts Ma Liang for his Magic Paintbrush. The Exclamation point was a very simple icon to create, I used the square paintbrush tool combined with the shift key to create straight lines.
Forging the World


I created the above images using only the square preset on the paintbrush tool in Photoshop. The gold Mountain seems like it took a long time to do however with clever use techniques such as copy and paste, after creating one rock I can copy paste and create a mountain. I also used colour Overlay to change the colour of the overall mountain to a more yellowish gold colour. From decreasing the opacity levels after using colour overlay I create a gold coloured Mountain, with all the details still be able to be seen.
The prop I struggled most with during production was the water prop. I found it difficult to comprehend how the water works in the Pokemon game. The white lines felt distorted when I went to create them and as a result I encountered a lot of trial and error. The challenge allowed me to develop skills with pixel art and gave me confidence to create more advanced props such as the building.
When creating the building prop I wanted to ensure that I could keep the pixel theme, I found the creation of the building to be a fun exercise to challenge the skills I had attained and developed thus far. To my surprise the building ended being relatively simple to construct, as the majority of the building consists of lines and squares.
Forging the World P2 - Grassland


To create a world inspired from pokemon, I needed to learn to create the vital props that are used within the game. The most repeated ones would be the trees, grass, tall grass and ledges. I used the square paintbrush tool to create all of these designs. I found the most challenging prop to design and create was the grass - located top left. I had to develep a pattern, memorize it and repeat it to create the illusion of layers of grass. I was able to successfully repeat the patterns and as a result I can forge pathways for my characters to walk.
The most effective technique I discovered to create sprites was to zoom into the screen from using the magnifying glass, this granted me a clearer vision of the object, and when the zoom was reversed, the pixels blend together creating an item or object. The second most powerful technique was the duplicate ability, With the ability to duplicate any portion of an image at will the process of creating the game world becomes much simpler.
Sprite Development - Scene Creation


My design for this scene remians unchanged from my initial design. I composed all the layers into one and exported this image as a PNG, ready to be used in Adobe Flash.


I enjoyed creating this scene as it provided me with the first opportunity of experiencing life in my world, more importantly I was able to see how utilitsing my props together I could create a world.


These two scenes are the exact same, bar the missing magic paintbrush on the table on the second scene. This scene is the second scene we see in the world, where the old man presents our protagonist with his magic paintbrush. I used the props I created and placed them in a position which could represent the inside of the building. In addition I wanted to create a similar layout to Professor Oak's lab.

This scene consists of a straight path way with a small pond which blocks the path. The intention with this scene is that the water acts as a blockage for the character and others, as seen in the story Ma Liang uses his paintbrush to help people; in this scenario he uses the move surf to cross the water.

I designed this scene to follow up from the previous scene, and the first scene where our protagonist encounters the antagonist. I simply took the grass sprite and placed it in a straight line, duplicated it and placed another row on the opposite side. I took the tree sprite and duplicated it multiple times to fill the empty space.

This scene consists of the health bars and corropsonding levels to represent the battle scene. The battle scene consists of mostly white space as seen in the game, with enough space to place the paintbrushes into screen when they battle. I enjoyed creating this scene, as I found it surprisingly simple in terms of positioning the shapes.

 The final scene consists of a warp pad, which is used by Ma Liang when he is requested to meet Badman. When Ma liang arrives the badman requests him to create a gold mountain. The forcoming gold mountain is the prime reason I left such a large amount of white space in the upper part of this scene. After the gold mountain is created, Ma Liang and Badman have a final battle. I struggled in terms of thinking of a place where a final battle would be most appropriate. I considered creating places such as the Pokemon League as seen in the game, however I scrapped this idea as it would extend the length of my animation.
Digital Storyboard

I created a digital storyboard composed with all the scenes I've created in order and with all the necessary props added. The animation begins with the title screen introducing the Magic Paintbrush in a arcade-retro style. The scene then cuts to the character creation where the protagonist and antagonist names are input. The scene then cuts to the "Let's go" text which eventually disappears triggering the event to cut to the next scene. Ma Liang is about to leave the village when an old man interrupts him and takes him to his lab. The next scene consists of Ma Liang receiving the Magic Paintbrush from the old man.

The scene then cuts to the next scene where water blocks the path. Ma liang uses his magic paintbrush to cross the water. The scene then cuts to the first encounter with the Badman, triggering a battle. During the battle badman uses the attack "Thief" (also an attack in the pokemon game) and steals the Magic Paintbrush from Ma Liang. Ma Liang whites out and is sent back to his village. He is informed that the Badman requests to meet him. The scene then cuts to the next scene where Ma Liang encounters the Badman a second time.

Badman requests Ma Liang to create a gold Mountain. The scene then cuts to the second battle with the two paintbrushes. Ma Liang uses the move "Hydro Wave" a reference to Hydro Pump in the Pokemon games and defeats Badman (as seen in the story).
Flash Development - Core Techniques I've Acquired
In this video I showcase my skills in effeciently using Tweening
In this video I demonstrate the use of symbols and how it helped me in creating my animation.
In this video I demonstrate a new technique I discovered: creating fade ins/outs. I used this technique multiple times throughout my animation.
Final Animation
Evaluation
Audience Response - Positive Feedback
From publishing my work to an audience I was able to achieve multiple opinions on my work thus far. Multiple responses included praise for my current work as it utilises the Pokemon theme effectively, resulting in a Magic Paintbrush version of Pokemon. This includes the use of props, and character designs which reflect the original Pokemon game and its pixelated theme. They informed me of my good choice of music and successful sync with the animation itself; most noticeably with the trigger for the battles and
Audience Response - Critical Feedback (Improvements)
The prime issues that I received from audience feedback was the wonky looking text at the beginning of my animation which hindered it from appearing at professional quality. I was informed that the process in which the text animates to the screen results in the text sizes appearing a little out of proportion. I was also informed of some issues that persist throughout the battle scenes. In the second battle scene where the magic Paintbrush appears on the screen, only one star animates whereas there are supposed to be multiple stars that appear around the paintbrush, similarly to the first battle scene. The final error that has been pointed out to me multiple times is the missing walk cycle at 1:25. This is a prime example in how publishing my work to an audience is advantageous as this error would not have been easily noticed due to it's small segment of walk animation.
3 Set Targets
Upon receiving an Audience response I have set three targets I wish to achieve in order to improve the quality of my animation.
- Improve the quality of the beginning text animation
- Fix the issue in which missing stars are noticed during the second battle
- Fix the walk Animation error at 1:25
These 3 targets are key to improving quality standards, and I plan to achieve them all.
Scene Development - A Personal Choice

Up to thus far I hadn't created a version of my main character facing directly towards the screen. By using the HTML colour codes for the previous colours I was able to create a coloured version of our protagonist with the same colours used for the other models.I needed to create this sprite in order to import him into the credits for my animation.

I wanted to reduce the amount of white space that was occurring throughout my animation. Although my animation is inspired from the Pokemon theme, which the original games are mostly black and white; I wanted to add my own touch to my animation. To achieve this I placed multiple sections of trees in the scene in which the the Badman requests the Gold Mountain. I believe this resolves the issue of too much white space, ultimately allowing the animation to feel more alive.
Meeting all 3 targets
1. Improve the quality of the text at the beginning of the animation


After Before
I noticed the text seemed wonky and poorly placed so I edited the position of the text to allow fluidity and to polish my animation. I believe the text feels higher in quality compared to it's previous form. I also checked over earlier text, mostly in the scenes in which the characters name are input and reorganized the position of some letters to clean up the scene.
2. Fix the issue in which missing stars are noticed during the second battle

The image above is a screenshot from the second battle between the two characters. During the spawn of the Magic Paintbrush I had an issue in which the stars wouldn't appear as they did in the first battle scene. This resulted in a clunky animation as the sound would play however only one star would animate onto the screen.
I have resolved this issue from adding multiple stars that would appear and disappear simultaneously after each other, then converting this to a symbol. I then added the symbol to this section of the animation to create more diversity and depth in this scene.
3. Resolve the walk Animation error at 1:25

The image above accurately shows the time frame in which the walk animation would fail to function. Instead of our protagonist walking across to the right, he slides across. When I returned to the animation time line, I had noticed that instead of the symbol; consisting of the walking right animation, that was placed on the layer, a simple JPEG image was located there instead. I resolved this issue from deleting the layer, applying the correct symbol and creating the classic tween from point A to point B.
After receiving audience feedback and re watching my animation I was eager to resolve these issues in order to bump the quality of my animation higher. I have discovered that there are always improvements and developments to be found and made. I have understood the importance of criticism as errors and improvements that may not have been noticed by the produced, are sure to be found and suggested by others.
The production of the credits
Credits Inspiration
PLAY @ 1:05
I was inspired by the Hall of Fame ending in pokemon red/blue/yellow. The credit sequence follows the traditional simplistic approach of lesser amounts of colours and objects taking up the screen. The credits begin with the soundtrack indicating the end of the game.
Each pokemon has two shots, a close up followed by a mid shot revealing the pokemon used for the game and their respective level and stats. The sound which represents each respective pokemon plays which further emphasises which pokemon is being displayed. Once all the pokemon have appeared onto the scene the main charatcer is finally presented at the end revealing the character name, total play time and stats.
Each pokemon has two shots, a close up followed by a mid shot revealing the pokemon used for the game and their respective level and stats. The sound which represents each respective pokemon plays which further emphasises which pokemon is being displayed. Once all the pokemon have appeared onto the scene the main charatcer is finally presented at the end revealing the character name, total play time and stats.
Extra Scenes

Above are my credits scenes which play immediately after the final battle between Ma Liang and the Badman. After the battle the screen holds white for a few seconds and shortly after is followed by the music. Following similar style to the pokemon end credits the magic paintbrush has two respective shots consisting of a close-up and a mid shot revealing the magic paintbrush. I also added my own touch to the credits from having the stars appear around the paintbrush when it is centred on the screen in addition to the paintbrush star music that also plays at this point.
The next scene follows a similar style to the paintbrush, this time the theme object is Ma Liang himself. Using the same shots from the Paintbrush's outro, our protagonist is placed in the centre of the screen with his name, and total play time for the animation displayed. Finally the animation fades to white, displaying "The End" ending the animation. From creating these credits I believe my animation feels more complete rather than just ending at the end of the battle, which could suggest something else could happen. The production of the credits allowed me to finalize my Flash skills in creating a basic animation, from creating fade-ins/outs, different camera shot types and simple key framing.
Additional Music
I selected this music theme due to its jumpy sections. I believe this syncs well with the ending credits and the constant appearing/disappearing actors and flowing animation. It creates a sense of life with the credits, and also is a fitting tune to end the animation off. I discovered this sound of Technoaxe's Youtube channel which has proved very useful in finding fitting sound tracks for my animation.
Final Animation Improved
Evaluation Final Cut
During the second showcase of my Animation I received updated feedback regarding the animation as a whole and how well it was received. I was told that my Animation holds excellent retro elements that compose the animation as a whole. In addition my Animation holds true to the story and effectively emits lots of drama and tension. I was questioned with the copyright with my soundtrack, which is a positive feedback response as I spent a lot of time carefully selecting out the most appropriate sounds and music in order to fit my Animation that hold no copyright segments. My animation shows that I had a clear animation style and theme in mind, ultimately successfully delivering an animation based on Pokemon.
I was informed that a few images are blurred and seem downscaled in quality despite their 8 bit approach. This was more noticable in the battle scenes vs the Badman. The Magic Paintbrush appears lower resolution than intended. Personally I did not notice this previously, therefore proves that further development and improvements can always be made to enhance the overall appearance in an animation. If I had the time I would create the Magic Paintbrush in a higher resolution than perhaps required; allowing the paintbrush to be downscaled instead of upscaled. From doing this I would be able to ensure the quality of the paintbrush and thus eliminate any issues that may have occurred relating to image quality.
I know your expertise on this. I must say we should have an online discussion on this. Writing only comments will close the discussion straight away! And will restrict the benefits from this information. video production norwich
ReplyDelete