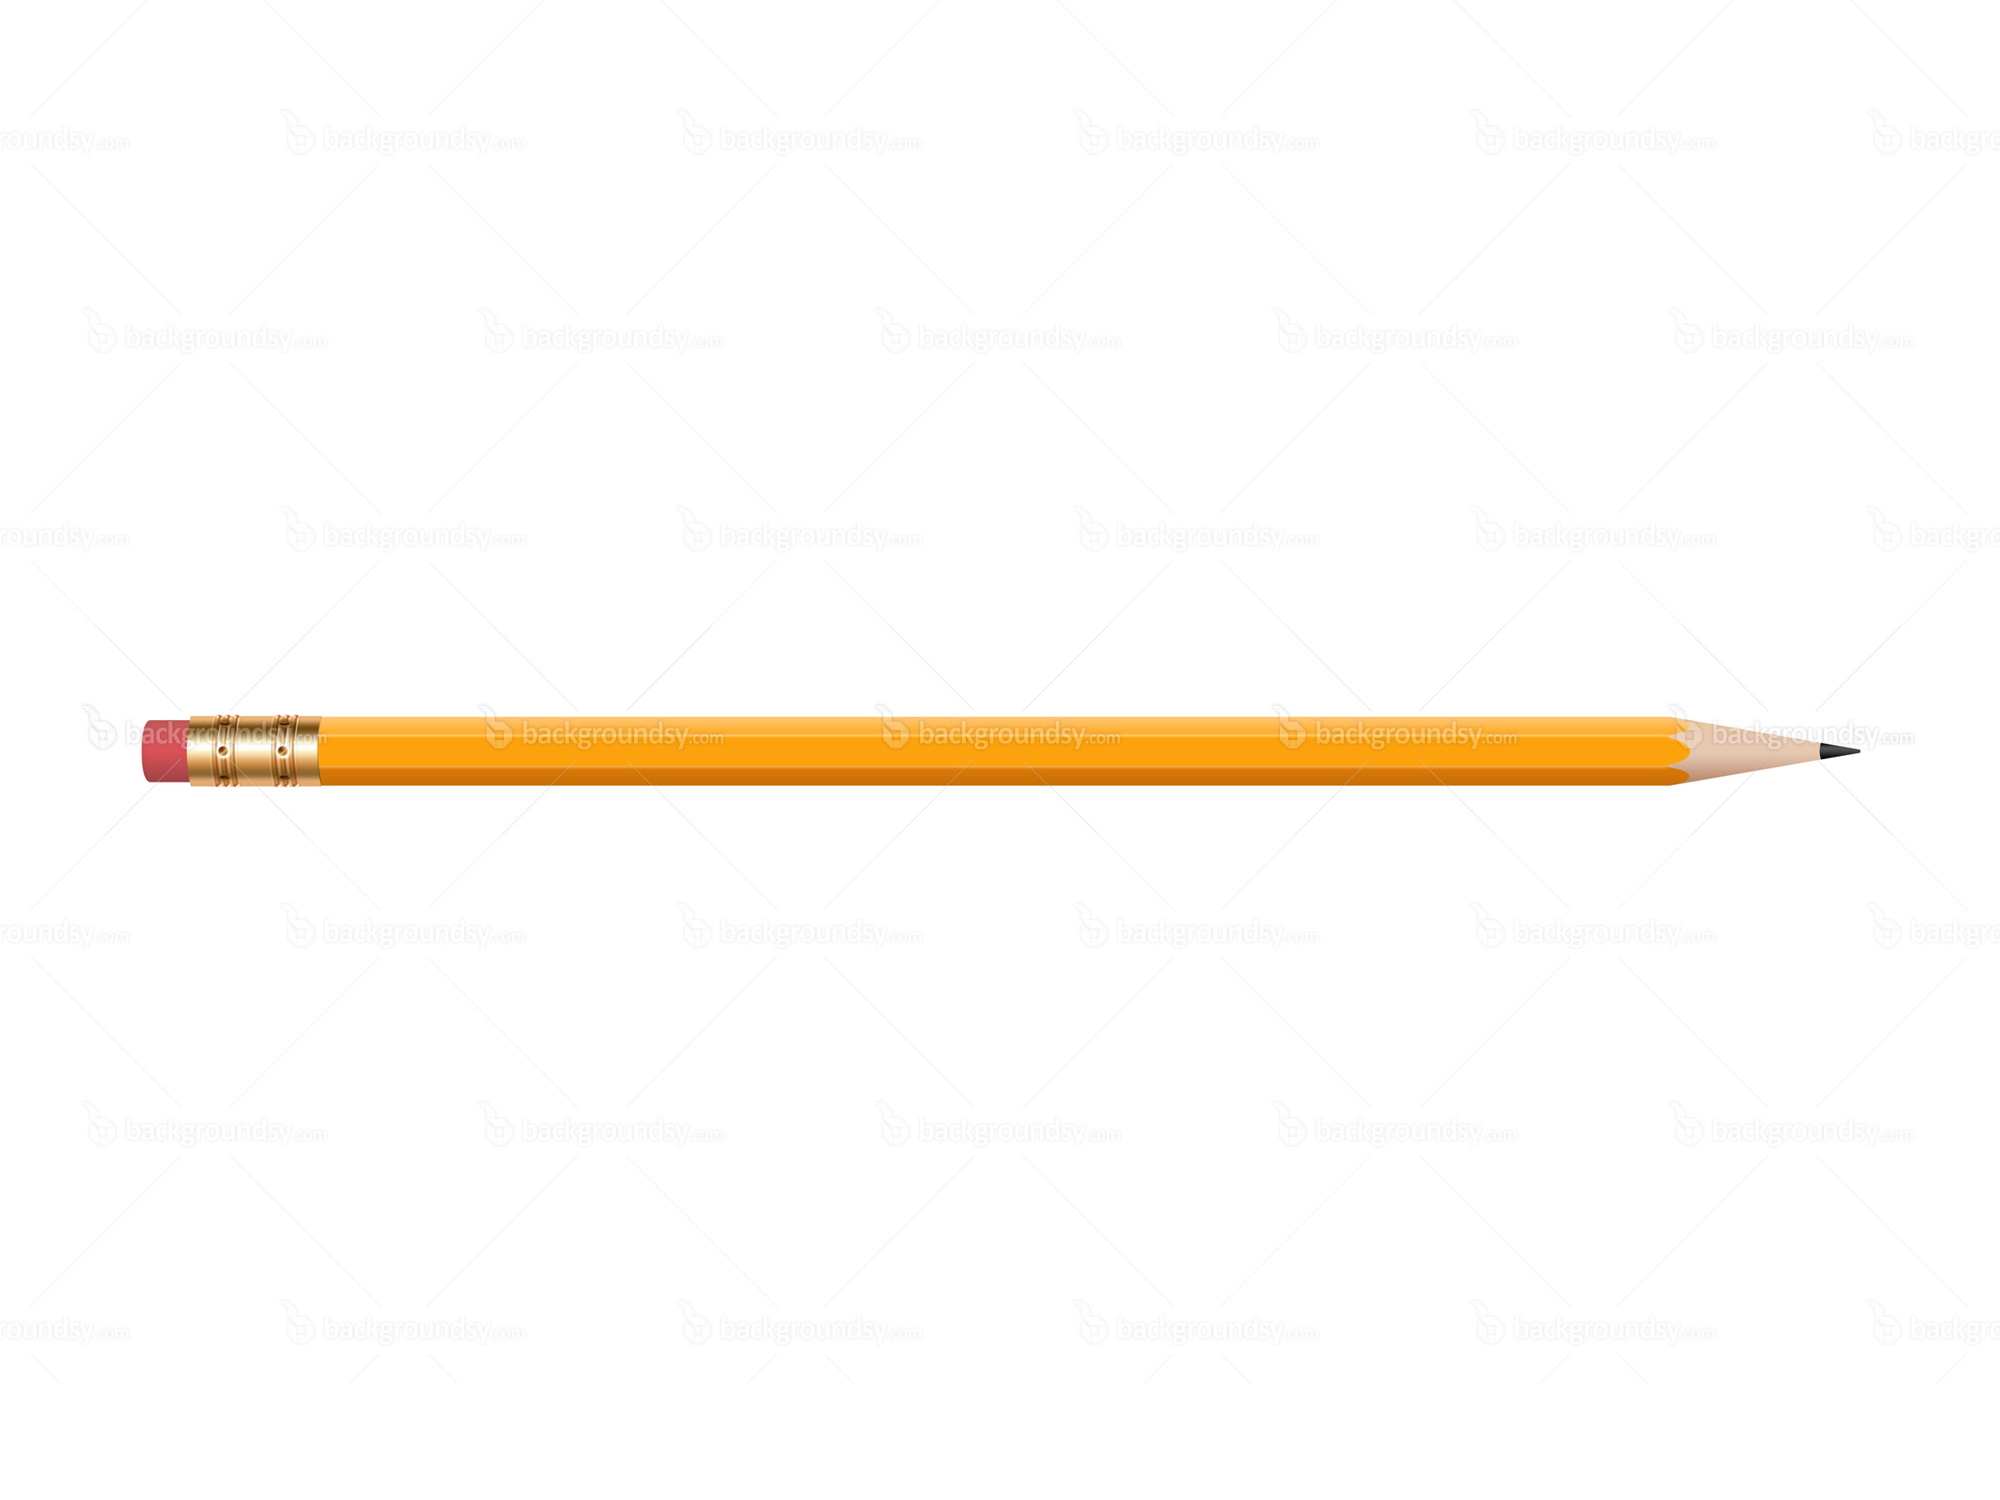
Material 1.
Material/Technique/ Process Name:
Pencil
Variations or types
Different colours and shades.
Different led length sizes. H/B – hardness and blackness on the led for the
pencils.

How do you use the
material/ Step by step instructions for technique or process?
Pick up Pencil with right/left hand
depending on what handed you are, with the led facing downwards. Apply pencil
to paper and move hand accordingly.
Relevant dimensions or constraints
A pencil is typically made of wood,
and can vary from 4cm to 15cm in length. Pencil length can decrease as the
pencil is used more often. Typically a pencils lifetime is at its end when the
length is no longer is holding in range.
Health and Safety issues related to Material, Technique or
Process
Take regular breaks to avoid straining
eyes when focusing for extended periods of time. Keep away from eyes. Sharp
edges can be potentially dangerous to damaging skin.
Evaluation (How you found exploring each Material, Technique
or process)
The Pencil can offer numerous
advantages as it allows you to visually portray your ideas, in forms of
drawings and text. A pencil can typically be used for creating designs and
experimenting with ideas. I found exploring the Pencil itself a relatively
simple task to begin with however I can foresee new techniques that await to be
found and developed.

A thunder SFX I discovered on Freesound.org
An Ocean SFX I discovered on Freesound.org
A Rain SFX I discovered on Freesound.org
Upon researching some weather SFX I discovered the clearest quality that consist of the ocean, rain and thunder. Using careful key framing I positioned each SFX at frames that would trigger an event. For example I played the thunder SFX's first keyframe a few frames after the flash/lightning effect plays. I believe that these SFX greatly amplify the atmosphere for my title screen, and add emphasis to the title itself: waters of the Horizon.
Waters of the Horizon
Additional Content - Typeface experiments
Material 2.
Material/Technique/
Process Name:
Pen
Variations or types
Different types of Pen consist of ballpoint, fountain, marker, rollerball. Different colours, typically blue and
black are recognised as the standard colour for a pen. Generally up to 10cm in
length
How do you use the
material/ Step by step instructions for technique or process?
Pick up Pen with right/left hand
depending on what handed you are, with the point facing downwards. Apply pen to
paper and move hand accordingly.
Relevant dimensions or constraints
A pen is typically made of plastic
and can vary from 6cm to 15cm in length. Unlike the Pencil, a pen will use ink
to function. Typically a pens lifetime is at its end when the ink levels have
reached zero.
Health and Safety issues related to Material, Technique or
Process
Take regular breaks to avoid straining
eyes when focusing for extended periods of time. Keep away from eyes. Keep ink
away from mouth.
Evaluation (How you found exploring each Material, Technique
or process)
A Pen differs from a pencil due to the
difference of material it uses to function. Led can be erased by using a simple
tool such as a rubber whereas a pen’s ink mark is usually permanent. I attempted to draw some 3d cubes and found that drawing with a pen can be
a challenging task due to the inability to erase the pens marks. This means
that mistakes or unnecessary marks have to be left on the worksheet. However
they can be worked with even if they are unfortunate.

Pen Experiments

I began experimenting the pen and was able to develop new techniques. I practiced various techniques such as dots, crosshatching and dashes. Although simple they provide different advantages when applied to a drawing, for example a crosshatching technique may be used to provide reference to shading or darker tones. Dashes can be used to connect small parts of an image or be used to add minimal detail to sections that need it.
I practiced line depth by placing different amounts of pressure with each stroke. The first stroke I placed mininal pressure which results in a light faded line, whereas towards the last stoke I applied maximum pressure creating more density and colour with the stroke.
Simple techniques such as dashes can be used to represent a style of art in a drawing. For example mulitple dashes stacked together could represent the grass. I practiced using techniques such as crosshatching, dashes and waves in 3D. I was able to distort the lines in such a way that created the illusion of 3D. By applying minimal pressure in specific places I achieved the look I was after. This task allowed me to develop skills that I was unaware of before in regards to basic pen movement such as the 3D effect and pressure levels.

Following from my development with basic line drawing, I wanted to attempt a more challenging approach. In an attempt to draw a set of cubes with a pen in 3D space. I was able to develop my 3D understanding and develop my ability in how lines should connect to form the cubes. Using a pen was a challenge in itself as a pen cannot be erased unlike a pencil. I used the dash/scribbling technique to put emphasis on shadows, which would appear if there was an emitting light source.
This was an extremely beneficial task as not only was I able to develop my 3 Dimension understanding I discovered the importance of precise pen movements in order to ensure I achieve the correction proportions.
Material 3.
There are few different variations of charcoal, consisting of:


How do you use the material/ Step by step instructions for technique or process?
Pick up Charcoal with right/left hand depending on what handed you are. Apply Charcoal to paper and move hand accordingly.
Relevant dimensions or constraints
Charcoal can vary from 6cm to 15cm in length.Typically a piece of Charcoal's lifetime is at its end when the length has completely diminished.
Health and Safety issues related to Material, Technique or Process
Avoid contact with eyes and mouth when using Charcoal. After usage be sure to wash hands to prevent contact.
Evaluation (How you found exploring each Material, Technique or process)
Charcoal differs from other materials due to its different types and functionality. I found Charcoal offers much potential with it's angles regarding position on the page. For example you can tilt the Charcoal vertical to create a shading effect or to create a straight line. Pressure applied also takes effect as depending on pressure you can create a darker or lighter shaded line.

In the image above I used Charcoal to draw some random items. I was able to tilt the charcoal to it's side and scrape it down the page to create a shading effect. I believe charcoal is very effect this way, as it can be held in a plethora of ways, each creating a unique effect.
I found that the marker pen offered more in terms of depth and intensity. A Pencil would produce a grey, textured effect depending on the amount of pressure applied to the material. A pen would produce a similar outcome, except with a more solid line. A Marker takes this even further and produces a thick solid line. I found the marker to be effective in terms of highlighting a specific selection. In particular creating logos and adding definition to the appearance.
Key Notes

I made some quick notes on the Poetry Slam website, and what needs to be included/excluded on the website. This is beneficial to me as it allows me to refer to my previous thoughts, ideas and important "must include"s when designing and creating my website.
Identifying the Poetry Slam Website

Located above is the current Poetry Slam website, The website consists of a purple theme, with the main logo presented to the right, and the hyperlinks to the left. This is a very odd layout for a website as the standard for a website is to have the logo presented in the top left with the hyperlinks placed below. The design is very minimal in terms of information and lacks a lot of definition in order to bring Poetry Slam to life.
In my opinion the website would benefit from some re-positioning with the logo position and hyperlinks location, combined with some added images of poetry slam, and the competition. The website could also use some other colour to bring out the vibes and appeal for poetry, rather than a blank purple background. This could be achieved from applying a texture or border to the image to add more definition and density to the design.
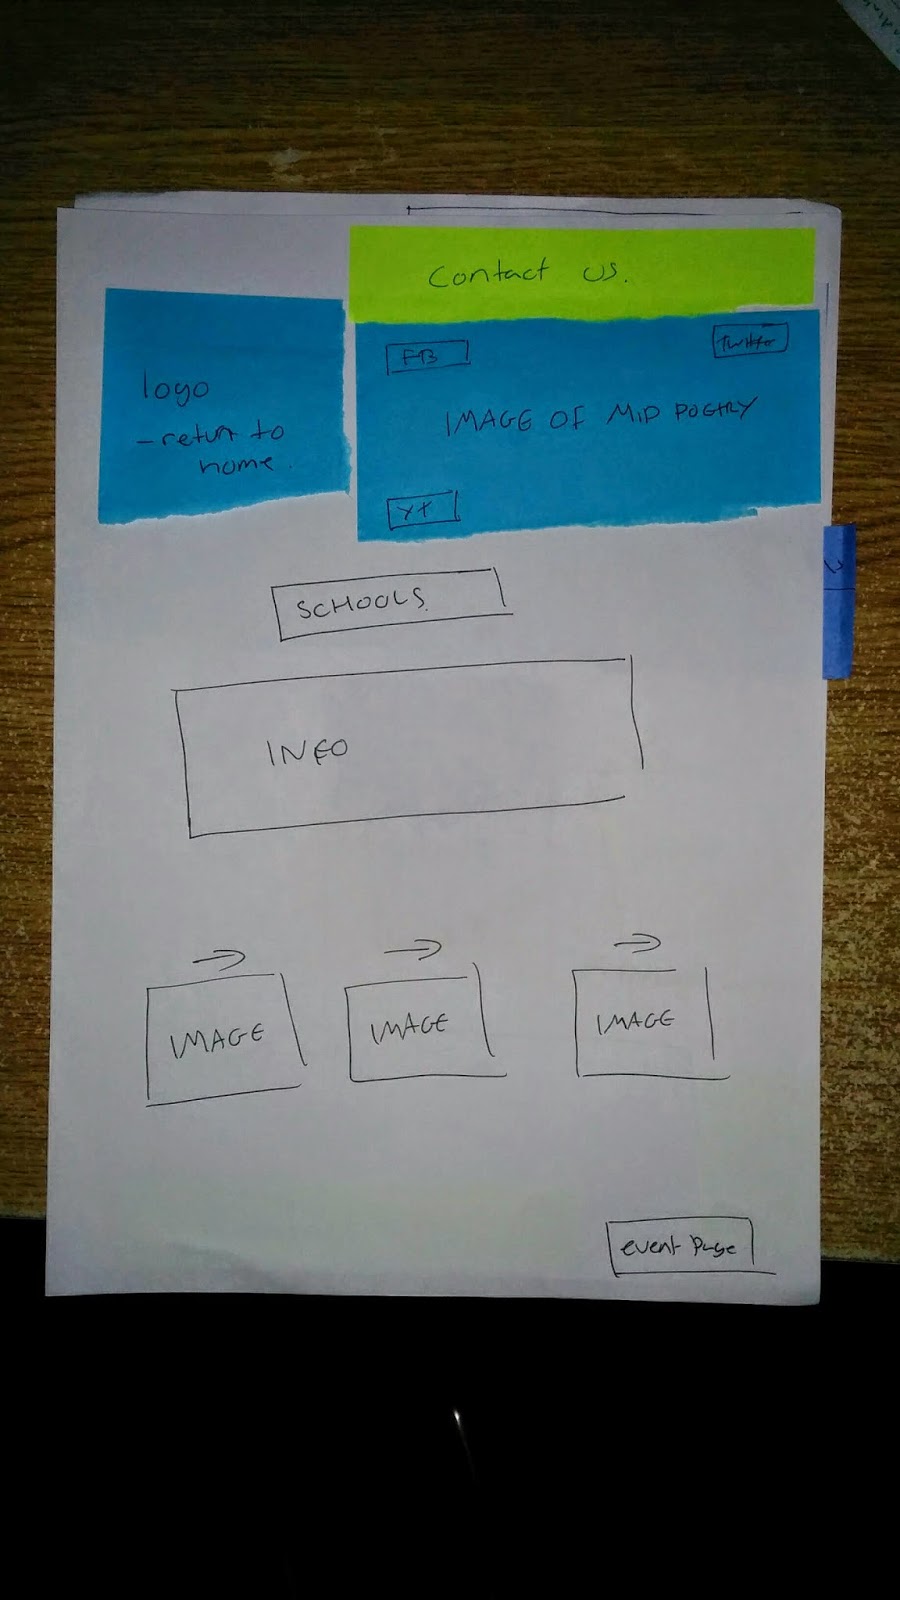
Paper Prototyping
Website Paper Prototyping is the typically creating a paper version of a website. The task involves creating the layout and design for each individual page and using sticky notes as place holders to represent where the actual working buttons would be.

Each button would hyperlink to their respective pages. During the production we worked in groups to create a paper prototype for a Poetry Slam website. First we began creating notes to which must meet the user requirements, then we began with the homepage.

During the task we were able to ensure that all criteria was met for the end user. This includes their request of adding Social Media links - we added Facebook Twitter and Youtube icons to represent each social Media.
We also succeeded in ensuring the website was accessible for students and teachers. The Homepage offers images that can be viewed by scolling through which helps promotes awareness of the Poetry Slam.

We had some issues regarding how users recognise each page. When a user attempted to work the website they encountered confusion to which page they were on as there was no clear indicator. This was due to adding the Contact Us button at the top of the page, we fixed the issue buy simply moving the button to the bottom of the page.
In addition we added a symbol to each individual page to help the user to understand what page they were on. IE Homepage icon for the homepage.

As a group we encountered issues on how to begin the paper prototyping for the Poetry Slam. To aid this we began researching example websites (such as the city of bristol website) for ideas and inspiration to how websites would actually look.
We created a record of the end user requirements, to ensure that all user requirements were met. Before we began prototyping we created an initial design for the homepage to work off of. I felt like our research to the task was successful however, I feel as if we needed to look more carefully into button location and functionality to avoid the error of having "contact us" at the top of the page.
In conclusion I feel as if our website functions well, disregarding the contact us location. From this excersise I feel I have refreshed my knowledge on designing websites, aswell as learning a new type method of design: paper prototyping itself.
 I also ensured to follow the same housestyle for each individual page, aswell as keeping general page layout identical on each page (IE having the logo at the top left) to ensure consistency and easy use for the user. In additon this helps avoid confusing of navigating to a different website, and users are aware of what page they are currently viewing.
Website Design Research - Evaluating Techniques


Website Design Thumbnails


My fifth design returns to placing the logo at the top left, followed with the image to the right. I placed the hyperlinks below the logo and experimented with adding social media to the design. I placed the social media links to the far left of the design, allowing it to be prioritised in terms of reading the website. This helps ensure the social media is seen and that users are aware of the links. I experimented with adding the contact button in different locations. I wanted to create a mirror effect with the social media links. I placed the contact button on the opposite side to allow for consistency, however I believe that the contact button would be more user friendly at the bottom of the page.
With my sixth design I wanted to experiment with the sizes and proportions of the layout. I decreased the size of the main image and increased the size of the logo and hyperlinks. I feel this approach would be too simple for the user, however still works in terms of layout order. I placed a bunch of image symbols at the bottom of the page to represent the image slideshow requested. I believe this was a prime opportunity for me to try it out and see how it might fit into my design. The issue I have wit this design is the sheer amount of images placed through out the layout. I feel the layout needs more text based sections to allow for some more consistency.
My seventh design is similar to my first design in regards to the logo and hyperlink being located in a downwards motion. I added the social media links at the bottom of the hyperlinks, however looking back on it now I believe that they would be more effective placed at the top, below the main image. I like this design as it's simple, provides all necessary information and doesn't clutter up space.
My eighth design; is very similar to my second design. This is my favourite design as it uses layout's from previous experiments and research and combines them into my own creation. I placed the logo in the top centre of the page, allowing the website to be easily distinguishable, with the links located to the left and right for quick access. With the image located directly below the logo and hyperlinks, the text is placed after, followed with the social media and contact links at the very bottom. This is what I believe a good design would include. It offers clear recognition for the site, aswell as providing all the information needed on the website without making it too bland or cluttered.
4 Select Designs


I selected this design as my final design because of it's simplicity. I feel the design acts perfectly in regards to meet end user requirements of targeting all ages. The simple layout of noticeably the links on the left offers easy use and navigation for the user.
From using the 960 grid reference I was able to create a final design of my selected piece. I found the process of developing my final design very beneficial as it allowed me to obtain a better understanding in how the website layout being simple is very important in terms of meeting the target audience. (kids and adults).
Seamless Textures
A Seamless texture is a texture which has been edited to a degree to crop out unwanted/out of proportion sections of an image to create the illusion of a texture with no unwanted parts. For example taking a photo of a brick wall, and when you go to use it as a texture it is unable to be used as a texture due to a crack in the wall.
The method in using this technique revolves around using the clone tool to create the illusion that the unwanted section is non existent. From using the selection tool to select the unwanted section, then using the clone tool you are able to overwrite unwanted sections. Obviously using the clone tool you are simply copying other parts of the image and pasting them over unwanted parts. with time and practice you can discover the correct section of the image to clone and create a very convincing piece of work.
Using this techinique i attempted to create my own textured image. I feel that my understanding of the technique itself is good however my approach to it could be improved. My work resulted in blurred lines where I attempted to clone them out, instead; using the tool too much on those areas.

The techinque is very useful for all kinds of scenarios, whether it be to edit out a section of an image, blend an image into one or simply creating a different kind of texture. I will be sure to use this technique in my website designs, as it will offer more potential and allow me to consider every texture (even ones that have unwanted parts) and edit them out myself.
Clone Tool Experiment

Following from my original Seamless Texture I created a secondary image using similar techniques. I took an image of a brick wall with a floorboard, added a curves effect to make the image more unique. I then selected the select tool and selected the floor in the image. I pasted the floor as a duplicate and moved it to the top of the page. I then flipped the image 180 degrees to act as the ceiling. Following which, I used the technique I used from the original Image: Cloning.
Using cloning in this image allowed the image to seem more seamless and realistic as can be even though the floor and ceiling are the same. I feel that from using the cloning technique I have discovered more potential ways to use it to create a cool effect, as seen in the image.
Texture Ideas with Seamless techniques & Filter Gallery


Using Photoshop I modified the image and was able to rotate and crop sections of it to allow it to become a seamless texture. using the selection tool in Photoshop I edited the previous texture to become more fluid in terms of joining the outer layers. I used the clone tool to finalize some sections which wouldn't function as a seamless texture.


I took the previous texture and began experimenting with different types of filters that could enhance the texture and change it to be more fitting for poetry. I selected the Water Paper filter in the filter Gallery and was able to change some settings to achieve this creative-water paper effect. Referring to some previous research I believe this type of texture would be an effective texture to be combined into the background or border for my design.

I applied the chalk and charcoal filter to this texture and it created this blackboard-like texture. I prefer this texture compared to the previous experiment result as I believe this texture offers more depth in terms of colour and shapes. In regards to which texture would be more effective for my design I believe the water paper themed one would be more efficient as it's more suited for the poetry theme, and would enforce the recognition of the website.

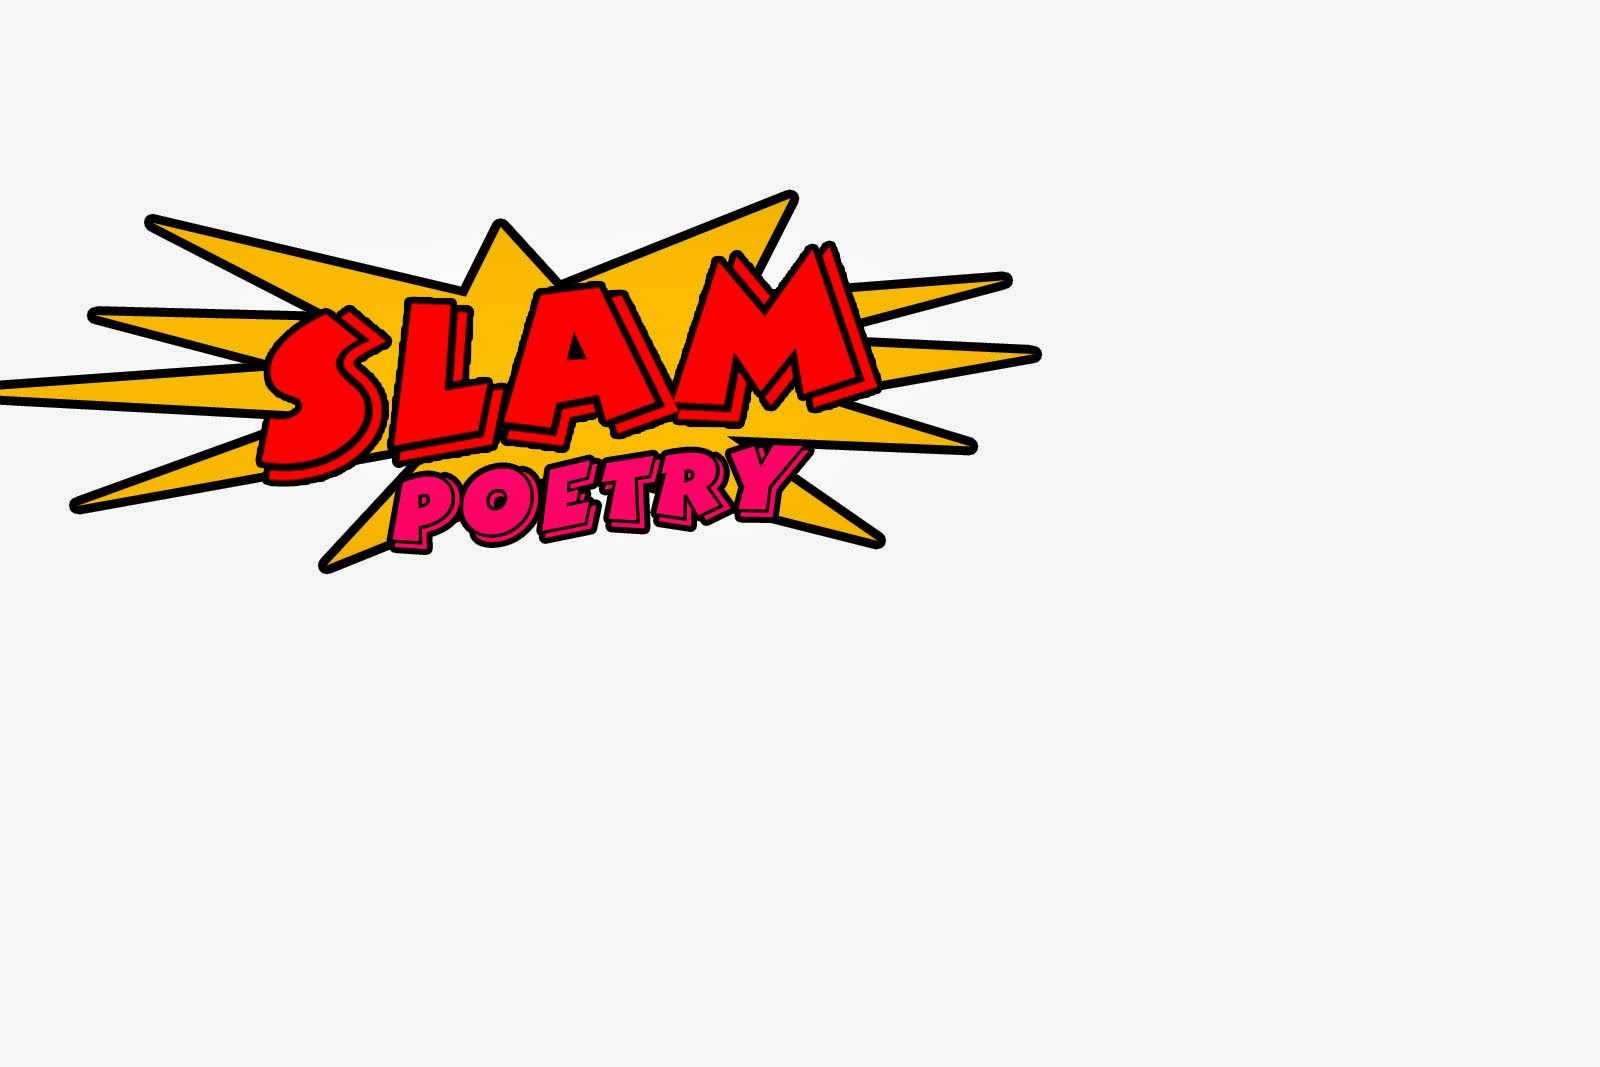
Slam Poetry Logo Research


This simple yet effective logo combines the use of drop shadow and a speech bubble to raise the intensity levels of the typeface, ultimately raising the awareness of Poetry Slam. The typography places emphasis on the word "slam" due to it's messy positioning.
.jpg)
The image conveys the use of black and white very well. The black and white suggest the words of the poetry, and is further suggested from the added pen image. The typography is also powerful as it suggests the text could have been written with a pen with one stroke. The black background also appears to be in form of a splat, perhaps some ink, that has been aggressively thrown. In addition this syncs in with the word slam, making this logo very powerful in terms of emphasizing the Poetry Slam.
Logo Inspiration & Development


 Finally, with this experiment I altered the colours to bring out some vibes within my logo. I had to be careful when changing the colour of the ink splat as other colours such as red could suggest other things like blood or gore. I believe the pinkish colours bring out a positive theme within the logo and would help raise awareness.
Visual Elements - Techniques Development
Feathering is a technique used similarly to the method of applying gradients. When cropping part of an image, instead of applying a fine cut and removing the selected crop part firmly, part of the image is left intact creating a fade out effect depending on the amount of feathering percentage selected.

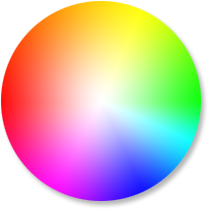
Manipulating Colours
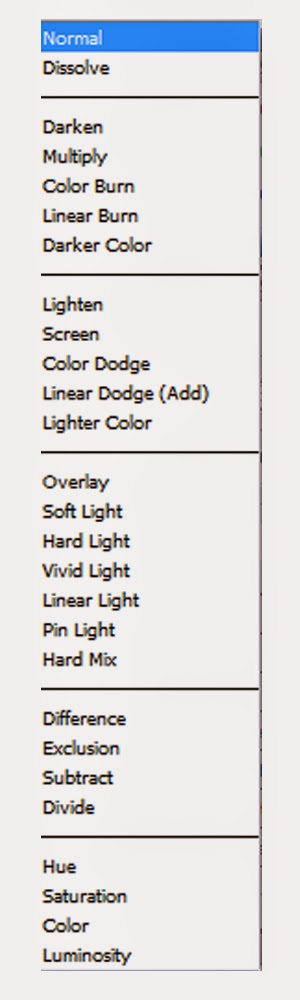
Illustrator and Photoshop offer tools that allow the user to create interesting colours and effects. One of the tools that I'll be experimenting with in my website development is the "Colour Mode". The colour mode changes the overall colour rules for the layers.
Effects like Dark, multipy and Darker Colour would increase the darkness of the overall composition, where as effects like Overlay, screen or any of the Lights would generally increase the overall brightness of the composition, each with slightly alternate impact.
 Effects like Colour Dodge and Colour Burn are modes that should generally be avoided in creating/designing a website for Poetry Slam. They reverse the layout of colours creating a neon effect which isn't really suited to the theme of the website. As a result I am particularly interested in the Overlay and range of "Light" Modes that may potentially be useful in manipulating the colours for my website.
In addition to experimenting with different colour modes, using curves and the Brightness/contrast effects in a combination with the colour modes are a very powerful tool, allowing further manipulation of colours and change even more.
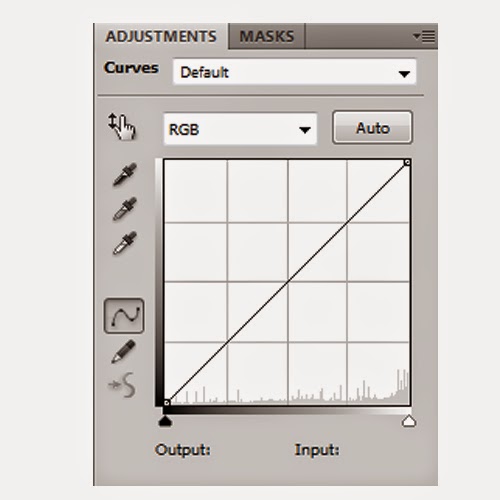
I found this particuarly useful to use on textures. These effects are powerful tools which allowed me to modify any objects (in this case textures) overall colour scheme. I was able to change a brown dirty texture to a blue, cold texture that could represent sense of insecurity.
The Curves effect is particularly effective as it allows me to increase or decrease very specific colours in order to create the colour scheme I desire.


Above are examples of me experimenting with the curves tool - . As displayed I can create a bloody red texture, or a cold abandoned texture by manipulating Colour Modes and Colour Effects. This will be a useful tool to use to tone down some unwanted colours, or alternatively increase the density of the texture if needed,
960 GS

To begin I measured out each placeholder on my chosen design. Each square represents 60 pixels, and the space between each square, also known as a margin represents 10 pixels each, totalling 20 pixels. In addition the space around the edge of the 960 grid, also known as a gutter represents 10 pixels.
The Design Cycle


Using Photoshop I composed a digital wireframe of my website. I used the 960 grid system as a reference for my icons, images and text placeholders. From which I was able to download and unzip the 960 GS from the net and place into my Photoshop document as a layer. I then enabled pixels as measurement for the ruler in Photoshop which assisted me in terms of attaining the correct proportions. I took the shape tool and began composing my website design. I changed the colours to allow the viewer to easily see where each section is.
I immediately discovered that from creating my homepage in Photoshop; how my website would actually look on the computer screen. From this I feel that my final website design feels a little bland, as a result I took ideas from one of my previous designs and incorporated them into this one; more noticeable from the buttons (Page Links).
As a result I feel this design was core in terms of development for my website. From changing the overall layout of my website, I feel I have successfully modified the way the website displays information. I have learnt from my paper prototype; and ensured the logo and image is displayed at the top of the page in order to ensure recognition.
C.R.A.P - Principles of Design
.jpg)
Applying C.R.A.P

In an attempt to apply the C.R.A.P process to my design this is the result. The most noticeable aspect I changed was the colour. I decided to change the colours from the original design to a red/yellow theme, as I feel they contrast together, as well as adding a summery-positive theme to the website.
I also applied a subtle Alignment addition in order to increase the amount of repetition in my design, and increase user recognition. The subtle changes consist of condensing the text box to be aligned with the recent images place holders, as you can see from my previous design the text placeholder extends slightly more when compared. The second subtle change I made was extending the placeholder for the Popular Video. In my previous design the placeholder ends prematurely and looks out of place. From applying C.R.A.P to my design I was able to correct this.
Overall I feel the use of C.R.A.P has helped me to recognise subtle issues and errors that I would not usually be aware of. I will be sure to apply it to my designs in the future, and refer to it when I make changes.
Final Website Layout

Using all the skills i developed thus far I created a final website layout, a layout that can be used as a reference to how the actual website home page would look once uploaded to the web. During this process I was challenged with the task to present how the website looks in my head onto actual software. I used the C.R.A.P process as a reference to creating this page.
Where each placeholder was located I placed the appropriate image relevant. I found this to be a fun task in which I could experiment with various techniques in Photoshop such as experimenting with the opacity, layers and images. I was able to import the background I had researched from my textures into this website as a suitable background. In addition I lowered the opacity of the hyperlinks to allow them to become more subtle with their approach, rather than having a harsh appearance.
In terms of importing the logo, I used the feathering technique in an attempt to blend the logo in more with the image.
Final Website Experiments

I created a second design, using my second logo design. I had also changed the colours of this logo to fit more with the C.R.A.P principles and to overall match the housestyle and colours of the design. I changed the Slam text to a light yellow and the Poetry to a light red/pinkish colour. I believe this logo is more suitable for my website as the cartoon logo doesn't fit well with the more realistic design approach for my website.

Using the Curves and Levels technique I was able to change the overall appearance for the top image. First I cropped out the top part of the image and placed it on a separate layer. By doing this I can now edit specifically the top part of the website.
I applied the Levels effect onto the layer and changed the options to create a black and white effect. Following this I used Curves to gradually re-add colour to the image. From doing this I was able to achieve a re-hash of the colours in the original image; producing an image with new colours. I found this effective because it allowed the image to blend in more with the overall website theme.
Adobe After Effects
.png) Adobe After effects is a digital motion graphic based software that uses GUI's to create visual effects and edit videos for films and television series. After Effects allows users to animate, edit and composite media in 2 dimensional and 2.5 dimensional space. After effects uses the layer orientated system, similar to the works of Adobe Photoshop.
Adobe After effects is a digital motion graphic based software that uses GUI's to create visual effects and edit videos for films and television series. After Effects allows users to animate, edit and composite media in 2 dimensional and 2.5 dimensional space. After effects uses the layer orientated system, similar to the works of Adobe Photoshop.
Uniquely to After Effects, it possess more powerful tools for animation; Keyframes. Keyframes can be used on almost any effect (including all the options) to create endless techniques and VFX's.
I plan on using Adobe After Effects to create a game title screen. I hope to record, produce and create many videos and screenshots of my development in After Effects.
Tomb Raider (2013) - Inspiration

I was inspired from the dark gritty atmospheric title screen of the most recent Tomb Raider. The screen offers multiple effects which enhance the outcome of the overall design. It uses a shot which consists of mountainous regions and rocky areas, in addition it uses a very convincing rain effect that adds to the mood of the title screen.
The title screen uses synchronous sound which further amplifies the dark conditions and setting for the games plot. I plan use this technique to encourage atmospheric conditions in my game title screen.
Waters of the Horizon - Base Production Video
In this video I showcase the production base for my title screen.
Colour Experiments
I experimented with different colours for my game title screen. Different colour effects can alter the overall appearance for the scene. My original composition is in pink which suggests a late-day/sunset setting. In order to achieve the darker atmosphere I experimented with different colour corrections tools. First I decreased the colour in the bottom layer to emphasise the water as a reflection. I then experimented with different colours for my composition.
From adding the blue colour to my cloud layers and experimenting with the colour levels and opacity I was able to change the time of day in my scene. The water appears much darker which emits a colder atmosphere and fits the theme for my waters of the horizon. In order to achieve this I experimented with Levels, Curves and the Colour saturation effects. From decreasing the lighter colours the blue became more apparent, thus eliminating the pinkish colours and bringing out the colder tone.
Creating Weather Effects
In this video I explore different effects to impact the appearance of my title screen. I wanted to add some rain to my composition, similarly to the tomb raider game title screen I researched earlier. To achieve this I could create a new layer, place the CC Rain effect onto the layer and change the colour modes to allow the rain to blend into the screen.
I looked at soft light, overlay, screen and add colour modes in order to use as a modifyer for the rain. The add colour was very dark, and over the top which resulted in reduced visibility in the scene, and as a result looked unprofessional and tacky. The remaining colour modes each offered their own different respective modifications. From selecting the screen and add colour modes I was able to achieve a more subtle approach to the weather effects. I wanted the rain to be more subtle as I believe too heavy rain will be too apparent and ruin the overall atmosphere for my composition.
I began to create a lightning effect in my scene. I achieved this by creating a new layer, selecting a white colour and creating keyframes to decrease and increase the opacity levels at appropriate times to create a flash in my animation. From experimenting with different colour modes I could decrease the subtlety of the flash which allows it to forge more with the scene. I found from selecting overlay as my chosen colour mode I reduce the white-screen effect which is a result of a normal colour mode, thus creating a convincing lightning flash.
Further Weather Development
I wanted to edit the flash I had previously created to make it appear as if the lightning struck slightly off screen. To achieve this I experimented further with the curves technique and applied a third curves to the top layer. Then I could increase the brightness of the top layer and keyframe it to appear simultaneously to the lighting flash. This enhanced the appearance of the title screen as it placed emphasis on the flash, ultimately increasing subtleness as well as bringing out more depth in the flash.
Colour Mode Experiments
In this video I revise my knowledge of colour modes and explore their different uses and effects. From trying different colour modes I can change the appearance of the composition as a whole. In particular I experiment with the colour modes for the flash as a whole, and how it may impact my composition.
Animating Text
In this video I begin to animate my text and explore different animations suitable for my title screen.
Further Techniques - Feathering
In this video I use the feathering technique to create an effect to increase clarity for the text.
Typography Development
In this Powerpoint I discuss type development, and how I forge it into my composition to create the scene for the Waters of the Horizon game title screen.
Sound Research
Pen Experiments
I began experimenting the pen and was able to develop new techniques. I practiced various techniques such as dots, crosshatching and dashes. Although simple they provide different advantages when applied to a drawing, for example a crosshatching technique may be used to provide reference to shading or darker tones. Dashes can be used to connect small parts of an image or be used to add minimal detail to sections that need it.
I practiced line depth by placing different amounts of pressure with each stroke. The first stroke I placed mininal pressure which results in a light faded line, whereas towards the last stoke I applied maximum pressure creating more density and colour with the stroke.
Simple techniques such as dashes can be used to represent a style of art in a drawing. For example mulitple dashes stacked together could represent the grass. I practiced using techniques such as crosshatching, dashes and waves in 3D. I was able to distort the lines in such a way that created the illusion of 3D. By applying minimal pressure in specific places I achieved the look I was after. This task allowed me to develop skills that I was unaware of before in regards to basic pen movement such as the 3D effect and pressure levels.
Following from my development with basic line drawing, I wanted to attempt a more challenging approach. In an attempt to draw a set of cubes with a pen in 3D space. I was able to develop my 3D understanding and develop my ability in how lines should connect to form the cubes. Using a pen was a challenge in itself as a pen cannot be erased unlike a pencil. I used the dash/scribbling technique to put emphasis on shadows, which would appear if there was an emitting light source.
This was an extremely beneficial task as not only was I able to develop my 3 Dimension understanding I discovered the importance of precise pen movements in order to ensure I achieve the correction proportions.
Material 3.
Material/Technique/ Process Name:
Charcoal
Variations or types
There are few different variations of charcoal, consisting of:

-Willow Charcoal: Generally soft and used for fast coverage for large areas.

-Vine Charcoal: It is more harder than Willow Charcoal and more difficult to erase.
-Nitram Charcoal: Unique Charcoal & hard to get hold of. Available in different hardnesses and can be sharpened to an extremely fine point. It's less messy than other charcoals.


fig
-Compressed Charcoal: The darkest of Charcoals however they can be very difficult to erase. Due to the messyness of these Charcoals they can be obtained as a Pencil as seen in fig.
How do you use the material/ Step by step instructions for technique or process?
Pick up Charcoal with right/left hand depending on what handed you are. Apply Charcoal to paper and move hand accordingly.
Relevant dimensions or constraints
Charcoal can vary from 6cm to 15cm in length.Typically a piece of Charcoal's lifetime is at its end when the length has completely diminished.
Health and Safety issues related to Material, Technique or Process
Avoid contact with eyes and mouth when using Charcoal. After usage be sure to wash hands to prevent contact.
Evaluation (How you found exploring each Material, Technique or process)
Charcoal differs from other materials due to its different types and functionality. I found Charcoal offers much potential with it's angles regarding position on the page. For example you can tilt the Charcoal vertical to create a shading effect or to create a straight line. Pressure applied also takes effect as depending on pressure you can create a darker or lighter shaded line.
Material 4.
Material/Technique/ Process Name:
Marker
Variations or types
Different type of marker consist of felt tips, whiteboard pens, flow or sharpies. Markers can be permanent - for example Sharpies which are usually used to ensure the mark does not get erased even
 when placed under intense conditions, eg football. Other makers such as a whiteboard marker can be erased simply by rubbing out when the marker is used on a whiteboard or similar material.
How do you use the material/ Step by step instructions for technique or process?
Pick up Marker with right/left hand depending on what handed you are, with the tip facing downwards. Apply marker to paper and move hand accordingly.
Relevant dimensions or constraints
A marker is typically made of plastic and can vary from 6cm to 15cm in length. A typical permanent marker consists of a container such as plastic and a core of an sborbent material. This filling serves as a container for the ink.

A marker can have different dimension tips and can be used for achieving different outcomes. One marker may have a slanted tip, and as a result creates a thicker line, whereas another may have a small pointed tip for added precision.
A marker can have different dimension tips and can be used for achieving different outcomes. One marker may have a slanted tip, and as a result creates a thicker line, whereas another may have a small pointed tip for added precision.
Health and Safety issues related to Material, Technique or Process
Take regular breaks to avoid straining eyes when focusing for extended periods of time. Keep away from eyes. Keep the marker away from mouth.
Evaluation (How you found exploring each Material, Technique or process)
I made some quick notes on the Poetry Slam website, and what needs to be included/excluded on the website. This is beneficial to me as it allows me to refer to my previous thoughts, ideas and important "must include"s when designing and creating my website.
Identifying the Poetry Slam Website
Located above is the current Poetry Slam website, The website consists of a purple theme, with the main logo presented to the right, and the hyperlinks to the left. This is a very odd layout for a website as the standard for a website is to have the logo presented in the top left with the hyperlinks placed below. The design is very minimal in terms of information and lacks a lot of definition in order to bring Poetry Slam to life.
In my opinion the website would benefit from some re-positioning with the logo position and hyperlinks location, combined with some added images of poetry slam, and the competition. The website could also use some other colour to bring out the vibes and appeal for poetry, rather than a blank purple background. This could be achieved from applying a texture or border to the image to add more definition and density to the design.
Paper Prototyping
Website Paper Prototyping is the typically creating a paper version of a website. The task involves creating the layout and design for each individual page and using sticky notes as place holders to represent where the actual working buttons would be.
During the task we were able to ensure that all criteria was met for the end user. This includes their request of adding Social Media links - we added Facebook Twitter and Youtube icons to represent each social Media.
We also succeeded in ensuring the website was accessible for students and teachers. The Homepage offers images that can be viewed by scolling through which helps promotes awareness of the Poetry Slam.
We had some issues regarding how users recognise each page. When a user attempted to work the website they encountered confusion to which page they were on as there was no clear indicator. This was due to adding the Contact Us button at the top of the page, we fixed the issue buy simply moving the button to the bottom of the page.
In addition we added a symbol to each individual page to help the user to understand what page they were on. IE Homepage icon for the homepage.
As a group we encountered issues on how to begin the paper prototyping for the Poetry Slam. To aid this we began researching example websites (such as the city of bristol website) for ideas and inspiration to how websites would actually look.
We created a record of the end user requirements, to ensure that all user requirements were met. Before we began prototyping we created an initial design for the homepage to work off of. I felt like our research to the task was successful however, I feel as if we needed to look more carefully into button location and functionality to avoid the error of having "contact us" at the top of the page.
In conclusion I feel as if our website functions well, disregarding the contact us location. From this excersise I feel I have refreshed my knowledge on designing websites, aswell as learning a new type method of design: paper prototyping itself.
I also ensured to follow the same housestyle for each individual page, aswell as keeping general page layout identical on each page (IE having the logo at the top left) to ensure consistency and easy use for the user. In additon this helps avoid confusing of navigating to a different website, and users are aware of what page they are currently viewing.Website Design Research - Evaluating Techniques

The blue colours contrast really well with this website design, the shades of blue are easy on the eyes, making the website seem less intimidating for the user. I can really appreciate the layout of this design due to it's simplicity, and the less-crowded information on the screen. The main links are located at the top of the page with the logo of the website placed at the top centre. I think this is an effective way to present the webpage, the user immediately is aware of what website they have visited due to the logo being placed directly in the centre. In addition the colours allow for easy recognition for the user when they first enter the site.
The logo for the website is placed in the middle which is an interesting technique as the eyes are drawn to the centre of the screen as soon as the user first lays eyes on the page. This is different compared to having the logo and an image in the centre of the screen. This website design is successful in terms of layout and simplicity, however sometimes it can lack some information, or space to add more.
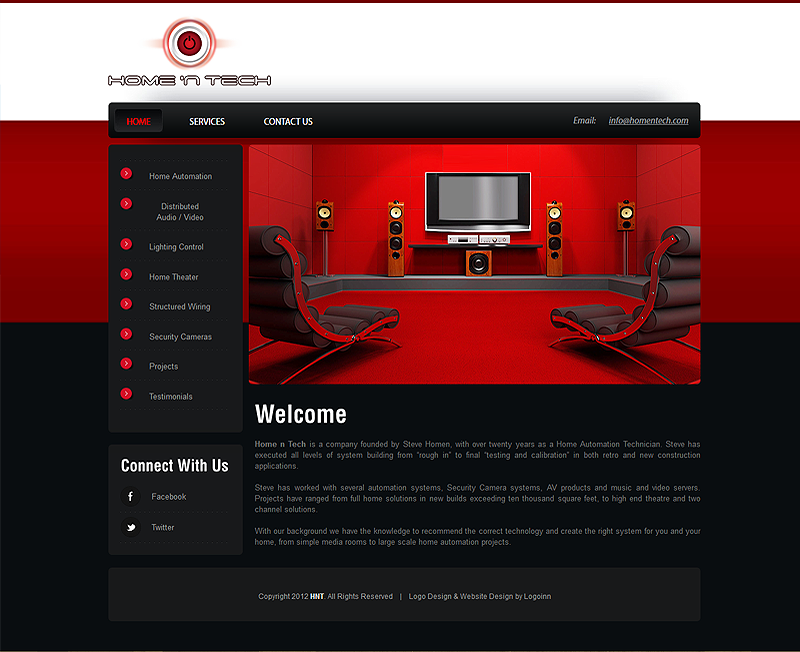
This website ensures its consistency by keeping the colours limited to three: red black and white. With the main colour for the website being red & black, the user can easy recognise the website through it's consistent colours. The layout for this website remains simple yet effective. The layout places the logo at the top left of the design, traditionally the first place a user would look when visiting a site.
The links are placed on the left side, with the social media links following after. This design technique is effective in ensuring the user does not feel lost on the site. An unusual approach to this layout is the contact and services link locations. These buttons appear at the top of the page directly below the logo. This

This website uses different colours that may not be as popular as other colours to use on a website. The shades of green create a garden-like feel which may suggest that this website design is the placeholder for a garden centre or flower store. However in my opinion the green feels a little bland and dull for a website and doesn't really appeal to me in terms of exploring the site.
The layout of the design is very effective in terms of presenting the necessary information needed to make the site recognisable. The logo is placed in the top centre of the page, surrounding an image which is very large in size, reinforcing the recognition of the site. Although the image is large, the website is very powerful in terms of ensuring a spacious information category. The website uses it's design in a method which ensures the user isn't bombed with information upon visiting the site. Instead they are greeted with the logo, large image and hyperlinks that are located at the top of the page, resulting in very easy navigation for the user. The user can then scroll down to reach important/recent information regarding the site.
In terms of using this design for slam poetry could be somewhat effective. The simplicity with the logo would increase the easiness for the user to navigate, however the bland colours may deter the user from the site.

This website uses three noticable colours: black, brown for the background and white for the text colour. Black and white are a stronger colour combination to use as they contrast well together however can result in a bland colour scheme. I like this website design because it uses a textures in an attempt to fill the void and decrease the emptiness. This is an effective approach as not only does it fill the void it offers density and life to the website, making it more of a pleasure to visit and browse.
The layout is relatively simple, placing the hyperlinks at the top of the page with the image and logo below, following the information below that. I believe placing the hyperlinks at the top of the page can be an effective approach as it allows regular users to be able to immediately navigate to the desired page, however this approach is unfriendly to the new user as they may not be familiar with the site; leading to possible confusion with navigation.
Website Design Thumbnails
I created 8 website designs for Slam Poetry. Using inspiration from my researched websites and learning from my mistakes from my paper prototype I was able to form designs based around these techniques. The first design places the logo at the top left of the page, which is generally the first place a viewer would look, following below the logo is the hyperlinks linking to their respective pages. I placed the contact button at the bottom of the page - being the general location for the contact button I believe this would be the most effective user friendly location.
My second design reverses this design a little, by placing the logo at the top right of the page, instead of the top left. I wanted to experiment with a different logo position to see if it would function properly. I believe that the logo would look more effective on the left rather than the right, as placing it on the right feels unnatural and encourages backwards reading which is not user friendly. I placed the hyperlinks below the image & logo, a similar approach used in one of the websites i researched. I believe this is more of an effective location for the hyperlinks as it can be read in the direction of reading a book - from left to right, from top to bottom thus increasing user friendliness.
I attempted a new layout experiment with my third design. I placed the logo at the top of the page with the hyperlinks in the centre (similar to my second design) and the information around the hyperlinks. I dislike this design as it feels hard to read and comprehend where things would be on the page. Although the logo is much larger providing more clarity to the user regarding what website they have visited, the actual design feels awkward and clunky. From this experiment I was able to confirm that placing the logo at the top of the page with hyperlinks close by an effective mindset to approach to take when designing websites. The link between the hyperlinks and logo must feel fluid to ensure user friendliness when navigating the site.
I wanted to try a different approach with my fourth design, learning from my paper prototype I wanted to give users recognition to which page their on, while placing the hyperlinks at the top of the page. To attempt to achieve this I enlarged the current page button, which assists in reinforcing the current page the user is on. I was inspired from one of my research website designs which used this method effectively. This allowed me to place the logo and image below the links, in order to ensure the user won't be confused when first entering the site.
My fifth design returns to placing the logo at the top left, followed with the image to the right. I placed the hyperlinks below the logo and experimented with adding social media to the design. I placed the social media links to the far left of the design, allowing it to be prioritised in terms of reading the website. This helps ensure the social media is seen and that users are aware of the links. I experimented with adding the contact button in different locations. I wanted to create a mirror effect with the social media links. I placed the contact button on the opposite side to allow for consistency, however I believe that the contact button would be more user friendly at the bottom of the page.
With my sixth design I wanted to experiment with the sizes and proportions of the layout. I decreased the size of the main image and increased the size of the logo and hyperlinks. I feel this approach would be too simple for the user, however still works in terms of layout order. I placed a bunch of image symbols at the bottom of the page to represent the image slideshow requested. I believe this was a prime opportunity for me to try it out and see how it might fit into my design. The issue I have wit this design is the sheer amount of images placed through out the layout. I feel the layout needs more text based sections to allow for some more consistency.
My seventh design is similar to my first design in regards to the logo and hyperlink being located in a downwards motion. I added the social media links at the bottom of the hyperlinks, however looking back on it now I believe that they would be more effective placed at the top, below the main image. I like this design as it's simple, provides all necessary information and doesn't clutter up space.
My eighth design; is very similar to my second design. This is my favourite design as it uses layout's from previous experiments and research and combines them into my own creation. I placed the logo in the top centre of the page, allowing the website to be easily distinguishable, with the links located to the left and right for quick access. With the image located directly below the logo and hyperlinks, the text is placed after, followed with the social media and contact links at the very bottom. This is what I believe a good design would include. It offers clear recognition for the site, aswell as providing all the information needed on the website without making it too bland or cluttered.
4 Select Designs
I completed a rehash of a select four designs from my overall designs. During this task i was able to use the 960 grid system which acts as a template basis for each web design to allow it to act as a standard and fit correctly to all devices. I was able to create an idea to how my designs would look on a structured page. I believe these designs utilize image position and size most efficiently resulting in ensuring consistency throughout the layout. With the 960 grid system acting as a guideline here for the sizes of my images and text placeholders I was able to develop a clear understanding in which sizes may need to change.
I selected the designs that I felt offered most potential in regards to meeting all end user requirements. I found the task a useful one in which it allowed me to have a close look at my designs, and more importantly discover which has most potential to act as a final design. I had also made minor changes to the designs in order to improve their functionality and layout.
Final Design
From using the 960 grid reference I was able to create a final design of my selected piece. I found the process of developing my final design very beneficial as it allowed me to obtain a better understanding in how the website layout being simple is very important in terms of meeting the target audience. (kids and adults).
Seamless Textures
A Seamless texture is a texture which has been edited to a degree to crop out unwanted/out of proportion sections of an image to create the illusion of a texture with no unwanted parts. For example taking a photo of a brick wall, and when you go to use it as a texture it is unable to be used as a texture due to a crack in the wall.
The method in using this technique revolves around using the clone tool to create the illusion that the unwanted section is non existent. From using the selection tool to select the unwanted section, then using the clone tool you are able to overwrite unwanted sections. Obviously using the clone tool you are simply copying other parts of the image and pasting them over unwanted parts. with time and practice you can discover the correct section of the image to clone and create a very convincing piece of work.
Using this techinique i attempted to create my own textured image. I feel that my understanding of the technique itself is good however my approach to it could be improved. My work resulted in blurred lines where I attempted to clone them out, instead; using the tool too much on those areas.
The techinque is very useful for all kinds of scenarios, whether it be to edit out a section of an image, blend an image into one or simply creating a different kind of texture. I will be sure to use this technique in my website designs, as it will offer more potential and allow me to consider every texture (even ones that have unwanted parts) and edit them out myself.
Clone Tool Experiment
Following from my original Seamless Texture I created a secondary image using similar techniques. I took an image of a brick wall with a floorboard, added a curves effect to make the image more unique. I then selected the select tool and selected the floor in the image. I pasted the floor as a duplicate and moved it to the top of the page. I then flipped the image 180 degrees to act as the ceiling. Following which, I used the technique I used from the original Image: Cloning.
Using cloning in this image allowed the image to seem more seamless and realistic as can be even though the floor and ceiling are the same. I feel that from using the cloning technique I have discovered more potential ways to use it to create a cool effect, as seen in the image.
Texture Ideas with Seamless techniques & Filter Gallery
I particularly like this texture as I feel it fits perfectly with the poetry theme. The paper-like effect gives the poetry feel and would properly allow the user to feel as if they are visiting a poetry themed site. I feel combined with the right font this image would be a very strong choice. Unfortunately due to the darker outlines won't be effective in terms of being a seamless texture choice as replicating the image will result in the image being duplicated multiple times as squares.
Using Photoshop I modified the image and was able to rotate and crop sections of it to allow it to become a seamless texture. using the selection tool in Photoshop I edited the previous texture to become more fluid in terms of joining the outer layers. I used the clone tool to finalize some sections which wouldn't function as a seamless texture.
I particularly like this image as I believe this texture has the potential to be transformed into an effective background for the website. To achieve this, using the Filter Gallery on Photoshop is a tool which allows overlays to be combined with images to transform them into something completely different. This will be effective because I will be able to transform this stone-rock texture into an image that would be more associated with Poetry.
I took the previous texture and began experimenting with different types of filters that could enhance the texture and change it to be more fitting for poetry. I selected the Water Paper filter in the filter Gallery and was able to change some settings to achieve this creative-water paper effect. Referring to some previous research I believe this type of texture would be an effective texture to be combined into the background or border for my design.
I experimented with this texture as a seamless texture as I believed it appears like paint dashes which could greatly be associated with the poetry theme. I also believe that the blobs feel intense due to the colour, however feel very light in terms of an image. I was able to use the clone tool to erase dark portions of the image and create my texture.
Overall I believe this task was very beneficial to me as allowed me to take the opportunity to research and experiment with some textures that may be associated with a specific theme. I believe this is similar to the process of ensuring user friendliness when designing website layout, as it helps me practice techniques needed to ensure the poetry theme feel, as well as ensuring the target audience is met.
Slam Poetry Logo Research
I like this logo as it produces an energetic vibe with the silhouettes and added texture. The silhouettes imply a party theme, suggesting the activeness of the poetry slam. I believe the purple and black colours contrast well, as they each make each other stand out, thus bringing more attention to the logo. Due to the silhoettes the typeface can also be coloured in white, reinforcing the attractivenss of the image.
This simple yet effective logo combines the use of drop shadow and a speech bubble to raise the intensity levels of the typeface, ultimately raising the awareness of Poetry Slam. The typography places emphasis on the word "slam" due to it's messy positioning.
The image conveys the use of black and white very well. The black and white suggest the words of the poetry, and is further suggested from the added pen image. The typography is also powerful as it suggests the text could have been written with a pen with one stroke. The black background also appears to be in form of a splat, perhaps some ink, that has been aggressively thrown. In addition this syncs in with the word slam, making this logo very powerful in terms of emphasizing the Poetry Slam.
Logo Inspiration & Development
I attempted to create a cartoon styled logo for Slam Poetry using Photoshop. I achieved this by creating a shape with many points, and colouring it in a solid yellow. I then applied a stroke effect to the shape to add depth to the image and reinforce the cartoon like style. I also applied the same technique to the font.
I wanted to improve the design by adding some additional diversity to the logo. I achieved this by using the free transform tool, rotated the words Slam and poetry at so they appear to be at an angle. I also duplicated both words and placed the copied layers slightly above each respective word and managed to achieve a 3D effect. This technique works well in combination with the tilted words as it emphasizes the 3D effect further due to the angle it's viewed at.
I was inspired by one of my researched logos, in particular the ink splat suggested logo. In an attempt to create my own I discovered a font that suggests paint/ink in order to create this messy looking technique. With careful positioning I was able to place the word directly within the ink splat, which ultimately allowed the word to stand out.
I experimented wit this design and changed the font of the "poetry" word to match the same as "slam", although it takes emphasis off the word "Slam" the reduced size helps compensate for the loss, and therefore acts as an effective change.
Visual Elements - Techniques Development
Feathering is a technique used similarly to the method of applying gradients. When cropping part of an image, instead of applying a fine cut and removing the selected crop part firmly, part of the image is left intact creating a fade out effect depending on the amount of feathering percentage selected.
I created the image above to research and demonstrate how feathering works and how i want to apply it to my website. From increasing the feather percentage the opacity gradient effect is exagerated. I believe this is a useful technique to use when working with textures and other images. It's a powerful tool that allows immense experimentation with gradients and colours. Feathering will be a useful tool to me when creating my website.
Manipulating Colours
Illustrator and Photoshop offer tools that allow the user to create interesting colours and effects. One of the tools that I'll be experimenting with in my website development is the "Colour Mode". The colour mode changes the overall colour rules for the layers.
Effects like Dark, multipy and Darker Colour would increase the darkness of the overall composition, where as effects like Overlay, screen or any of the Lights would generally increase the overall brightness of the composition, each with slightly alternate impact.
In addition to experimenting with different colour modes, using curves and the Brightness/contrast effects in a combination with the colour modes are a very powerful tool, allowing further manipulation of colours and change even more.
I found this particuarly useful to use on textures. These effects are powerful tools which allowed me to modify any objects (in this case textures) overall colour scheme. I was able to change a brown dirty texture to a blue, cold texture that could represent sense of insecurity.
The Curves effect is particularly effective as it allows me to increase or decrease very specific colours in order to create the colour scheme I desire.
Above are examples of me experimenting with the curves tool - . As displayed I can create a bloody red texture, or a cold abandoned texture by manipulating Colour Modes and Colour Effects. This will be a useful tool to use to tone down some unwanted colours, or alternatively increase the density of the texture if needed,
960 GS
To begin I measured out each placeholder on my chosen design. Each square represents 60 pixels, and the space between each square, also known as a margin represents 10 pixels each, totalling 20 pixels. In addition the space around the edge of the 960 grid, also known as a gutter represents 10 pixels.
The Design Cycle
Composing a wireframe in Photoshop
Using Photoshop I composed a digital wireframe of my website. I used the 960 grid system as a reference for my icons, images and text placeholders. From which I was able to download and unzip the 960 GS from the net and place into my Photoshop document as a layer. I then enabled pixels as measurement for the ruler in Photoshop which assisted me in terms of attaining the correct proportions. I took the shape tool and began composing my website design. I changed the colours to allow the viewer to easily see where each section is.
I immediately discovered that from creating my homepage in Photoshop; how my website would actually look on the computer screen. From this I feel that my final website design feels a little bland, as a result I took ideas from one of my previous designs and incorporated them into this one; more noticeable from the buttons (Page Links).
As a result I feel this design was core in terms of development for my website. From changing the overall layout of my website, I feel I have successfully modified the way the website displays information. I have learnt from my paper prototype; and ensured the logo and image is displayed at the top of the page in order to ensure recognition.
C.R.A.P - Principles of Design
Applying C.R.A.P
In an attempt to apply the C.R.A.P process to my design this is the result. The most noticeable aspect I changed was the colour. I decided to change the colours from the original design to a red/yellow theme, as I feel they contrast together, as well as adding a summery-positive theme to the website.
I also applied a subtle Alignment addition in order to increase the amount of repetition in my design, and increase user recognition. The subtle changes consist of condensing the text box to be aligned with the recent images place holders, as you can see from my previous design the text placeholder extends slightly more when compared. The second subtle change I made was extending the placeholder for the Popular Video. In my previous design the placeholder ends prematurely and looks out of place. From applying C.R.A.P to my design I was able to correct this.
Overall I feel the use of C.R.A.P has helped me to recognise subtle issues and errors that I would not usually be aware of. I will be sure to apply it to my designs in the future, and refer to it when I make changes.
Final Website Layout
Where each placeholder was located I placed the appropriate image relevant. I found this to be a fun task in which I could experiment with various techniques in Photoshop such as experimenting with the opacity, layers and images. I was able to import the background I had researched from my textures into this website as a suitable background. In addition I lowered the opacity of the hyperlinks to allow them to become more subtle with their approach, rather than having a harsh appearance.
In terms of importing the logo, I used the feathering technique in an attempt to blend the logo in more with the image.
Final Website Experiments
I created a second design, using my second logo design. I had also changed the colours of this logo to fit more with the C.R.A.P principles and to overall match the housestyle and colours of the design. I changed the Slam text to a light yellow and the Poetry to a light red/pinkish colour. I believe this logo is more suitable for my website as the cartoon logo doesn't fit well with the more realistic design approach for my website.
Using the Curves and Levels technique I was able to change the overall appearance for the top image. First I cropped out the top part of the image and placed it on a separate layer. By doing this I can now edit specifically the top part of the website.
I applied the Levels effect onto the layer and changed the options to create a black and white effect. Following this I used Curves to gradually re-add colour to the image. From doing this I was able to achieve a re-hash of the colours in the original image; producing an image with new colours. I found this effective because it allowed the image to blend in more with the overall website theme.
Adobe After Effects
Adobe After effects is a digital motion graphic based software that uses GUI's to create visual effects and edit videos for films and television series. After Effects allows users to animate, edit and composite media in 2 dimensional and 2.5 dimensional space. After effects uses the layer orientated system, similar to the works of Adobe Photoshop.Uniquely to After Effects, it possess more powerful tools for animation; Keyframes. Keyframes can be used on almost any effect (including all the options) to create endless techniques and VFX's.
I plan on using Adobe After Effects to create a game title screen. I hope to record, produce and create many videos and screenshots of my development in After Effects.
Tomb Raider (2013) - Inspiration
I was inspired from the dark gritty atmospheric title screen of the most recent Tomb Raider. The screen offers multiple effects which enhance the outcome of the overall design. It uses a shot which consists of mountainous regions and rocky areas, in addition it uses a very convincing rain effect that adds to the mood of the title screen.
The title screen uses synchronous sound which further amplifies the dark conditions and setting for the games plot. I plan use this technique to encourage atmospheric conditions in my game title screen.
Waters of the Horizon - Base Production Video
In this video I showcase the production base for my title screen.
Colour Experiments
I experimented with different colours for my game title screen. Different colour effects can alter the overall appearance for the scene. My original composition is in pink which suggests a late-day/sunset setting. In order to achieve the darker atmosphere I experimented with different colour corrections tools. First I decreased the colour in the bottom layer to emphasise the water as a reflection. I then experimented with different colours for my composition.
From adding the blue colour to my cloud layers and experimenting with the colour levels and opacity I was able to change the time of day in my scene. The water appears much darker which emits a colder atmosphere and fits the theme for my waters of the horizon. In order to achieve this I experimented with Levels, Curves and the Colour saturation effects. From decreasing the lighter colours the blue became more apparent, thus eliminating the pinkish colours and bringing out the colder tone.
Creating Weather Effects
In this video I explore different effects to impact the appearance of my title screen. I wanted to add some rain to my composition, similarly to the tomb raider game title screen I researched earlier. To achieve this I could create a new layer, place the CC Rain effect onto the layer and change the colour modes to allow the rain to blend into the screen.
I looked at soft light, overlay, screen and add colour modes in order to use as a modifyer for the rain. The add colour was very dark, and over the top which resulted in reduced visibility in the scene, and as a result looked unprofessional and tacky. The remaining colour modes each offered their own different respective modifications. From selecting the screen and add colour modes I was able to achieve a more subtle approach to the weather effects. I wanted the rain to be more subtle as I believe too heavy rain will be too apparent and ruin the overall atmosphere for my composition.
I began to create a lightning effect in my scene. I achieved this by creating a new layer, selecting a white colour and creating keyframes to decrease and increase the opacity levels at appropriate times to create a flash in my animation. From experimenting with different colour modes I could decrease the subtlety of the flash which allows it to forge more with the scene. I found from selecting overlay as my chosen colour mode I reduce the white-screen effect which is a result of a normal colour mode, thus creating a convincing lightning flash.
Further Weather Development
I wanted to edit the flash I had previously created to make it appear as if the lightning struck slightly off screen. To achieve this I experimented further with the curves technique and applied a third curves to the top layer. Then I could increase the brightness of the top layer and keyframe it to appear simultaneously to the lighting flash. This enhanced the appearance of the title screen as it placed emphasis on the flash, ultimately increasing subtleness as well as bringing out more depth in the flash.
Colour Mode Experiments
In this video I revise my knowledge of colour modes and explore their different uses and effects. From trying different colour modes I can change the appearance of the composition as a whole. In particular I experiment with the colour modes for the flash as a whole, and how it may impact my composition.
Animating Text
In this video I begin to animate my text and explore different animations suitable for my title screen.
Further Techniques - Feathering
In this video I use the feathering technique to create an effect to increase clarity for the text.
Typography Development
In this Powerpoint I discuss type development, and how I forge it into my composition to create the scene for the Waters of the Horizon game title screen.
Sound Research
A thunder SFX I discovered on Freesound.org
An Ocean SFX I discovered on Freesound.org
A Rain SFX I discovered on Freesound.org
Upon researching some weather SFX I discovered the clearest quality that consist of the ocean, rain and thunder. Using careful key framing I positioned each SFX at frames that would trigger an event. For example I played the thunder SFX's first keyframe a few frames after the flash/lightning effect plays. I believe that these SFX greatly amplify the atmosphere for my title screen, and add emphasis to the title itself: waters of the Horizon.
Waters of the Horizon
In this Powerpoint Presentation I react to feedback and further develop my game title screen with different font types and extra features.
Waters of the Horizon Improved
No comments:
Post a Comment